How Do I Merge My Staging Site with the Live Site?
Step 1 of 10
Open site management
Click on your site name in the Sites page to open management options for that website.
Note: If you manage multiple sites, confirm the site URL shown below the name to ensure you select the correct site.

Step 2 of 10
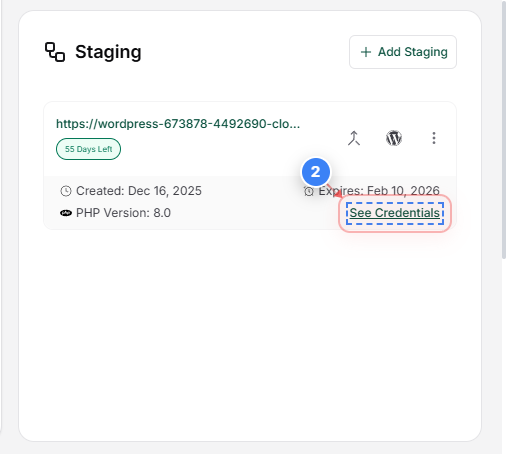
Access staging site credentials
Click the "See Credentials" button on the right side of the Site details page to view the detailed information of the staging site.
Note: This section is commonly used to review WordPress admin access, server credentials, and environment details of the staging site.
Step 3 of 10
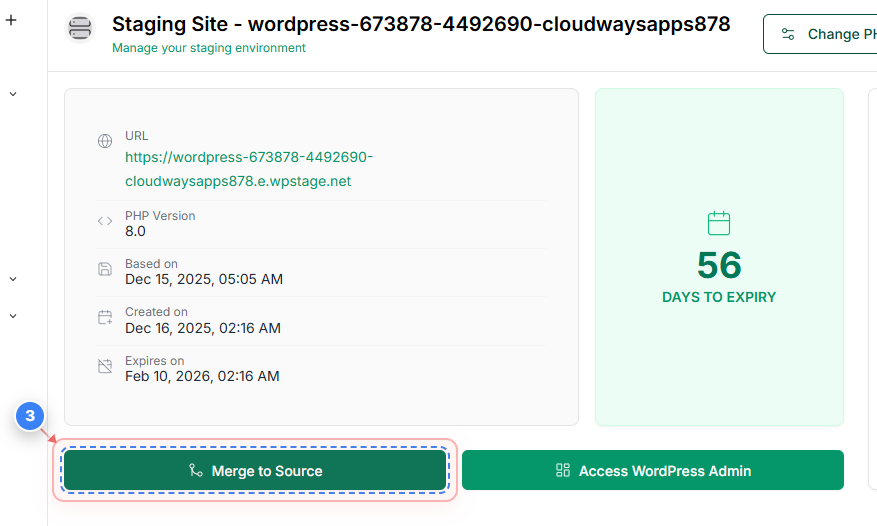
Start the Merge process
Click the "Merge to Source" button in the staging site details area to begin the merge process
Note: Before continuing, confirm the staging URL matches what you expect to merge.
Step 4 of 10
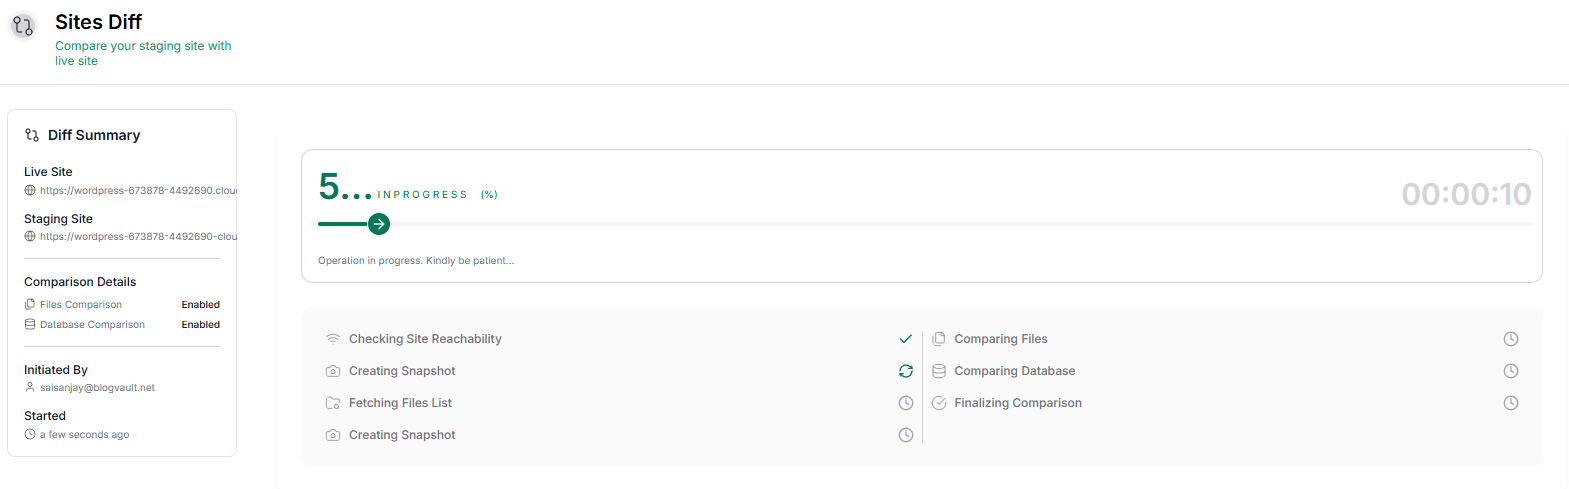
Review site diff progress
The site diff task page shows the progress of comparing your staging site with the live site, including file and database checks.
Note: Wait until the comparison completes before moving forward.
Step 5 of 10
Review files and directories
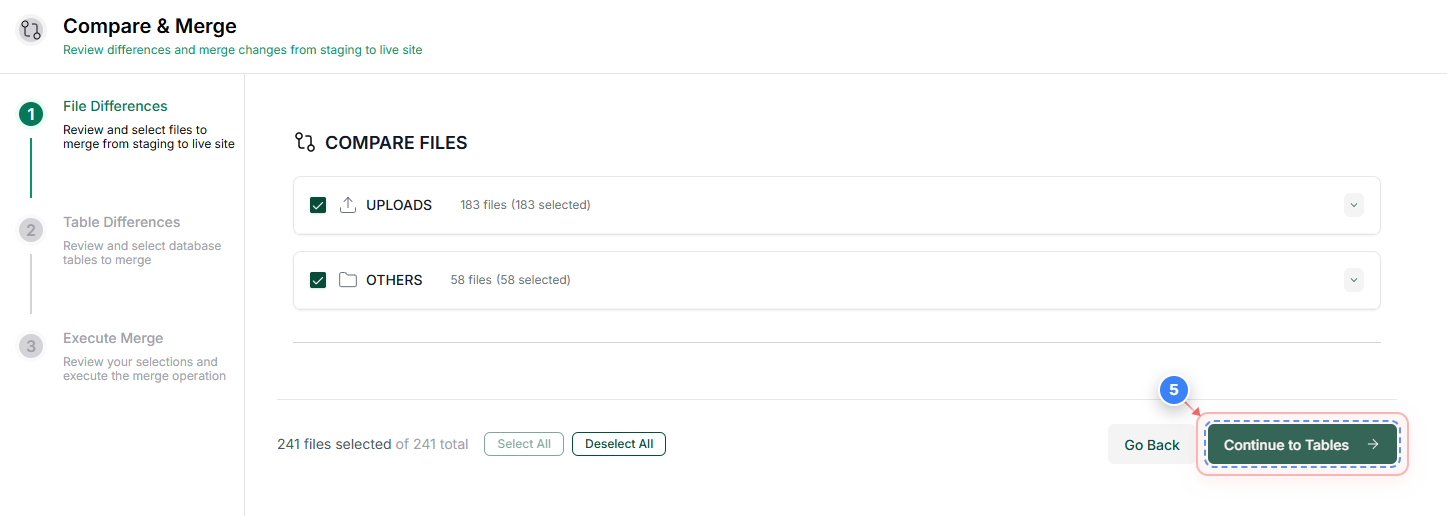
Once the site diff is complete, review the files and click the "Continue to Tables" button on the right side of the files comparison page to move from file selection to database table selection. Note: Exclude any files/directories if required.
Note: Confirm the number of selected files matches your expectations before continuing.
Step 6 of 10
Review database tables
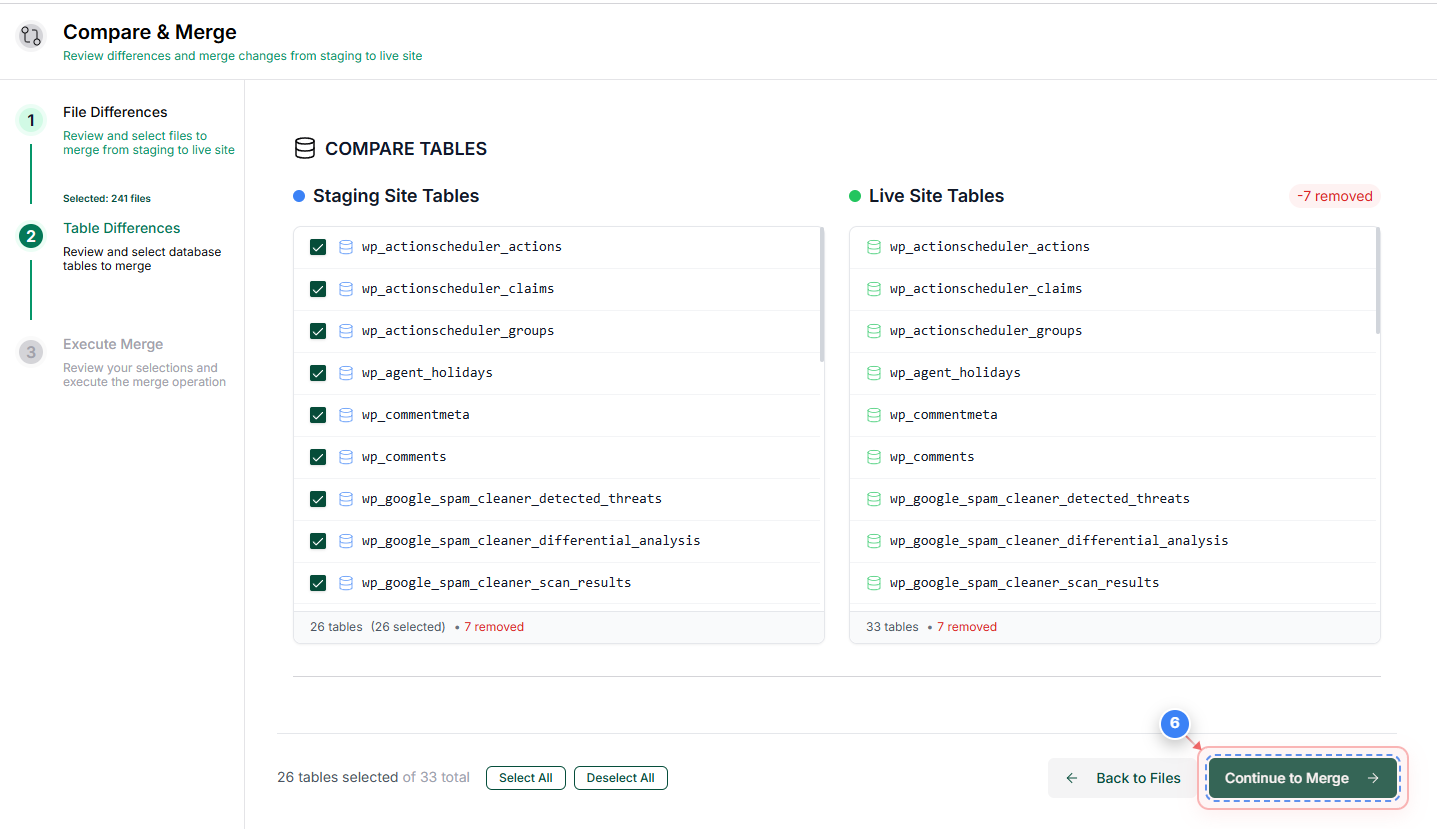
Click the "Continue to Merge" option at the bottom-right of the tables page to move to the merge preparation step. Note: Exclude any tables if required.
Note: Review the selected tables carefully, especially if your site has dynamic or user-generated data.
Step 7 of 10
Validate merge connection
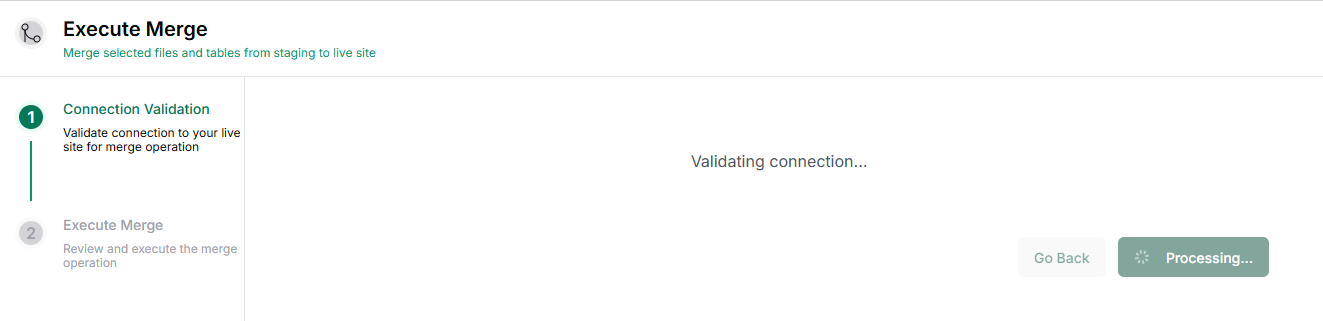
The merge connection page verifies connectivity to your live site and prepares the environment for the merge operation.
Note: If the connection fails, we will request you to enter the FTP/SFTP credentials of the live site to start the merge process.
Step 8 of 10
Confirm pre-merge checks
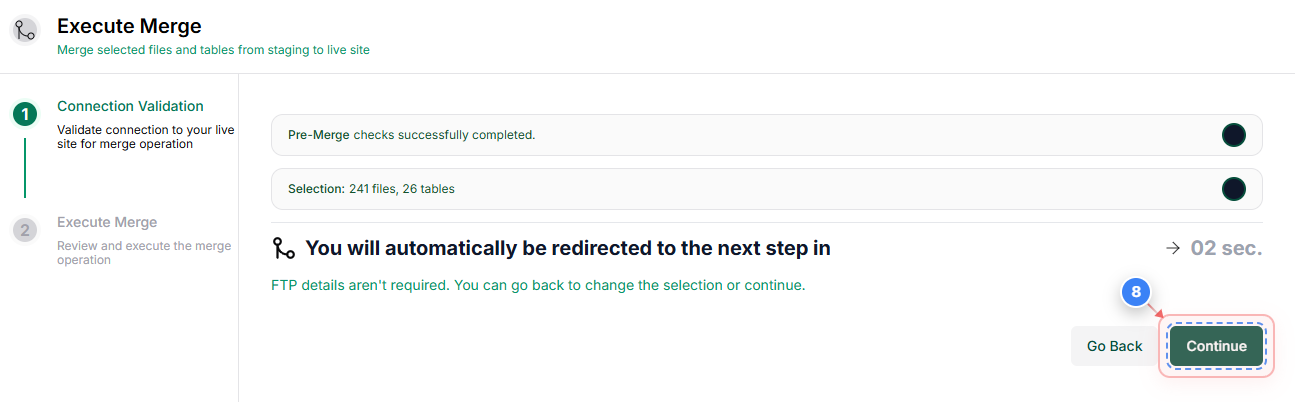
Once the validation is complete, click the "Continue" button to move to the next step.
Note: You can skip this step as you will be automatically taken to the next step after 5 seconds
Step 9 of 10
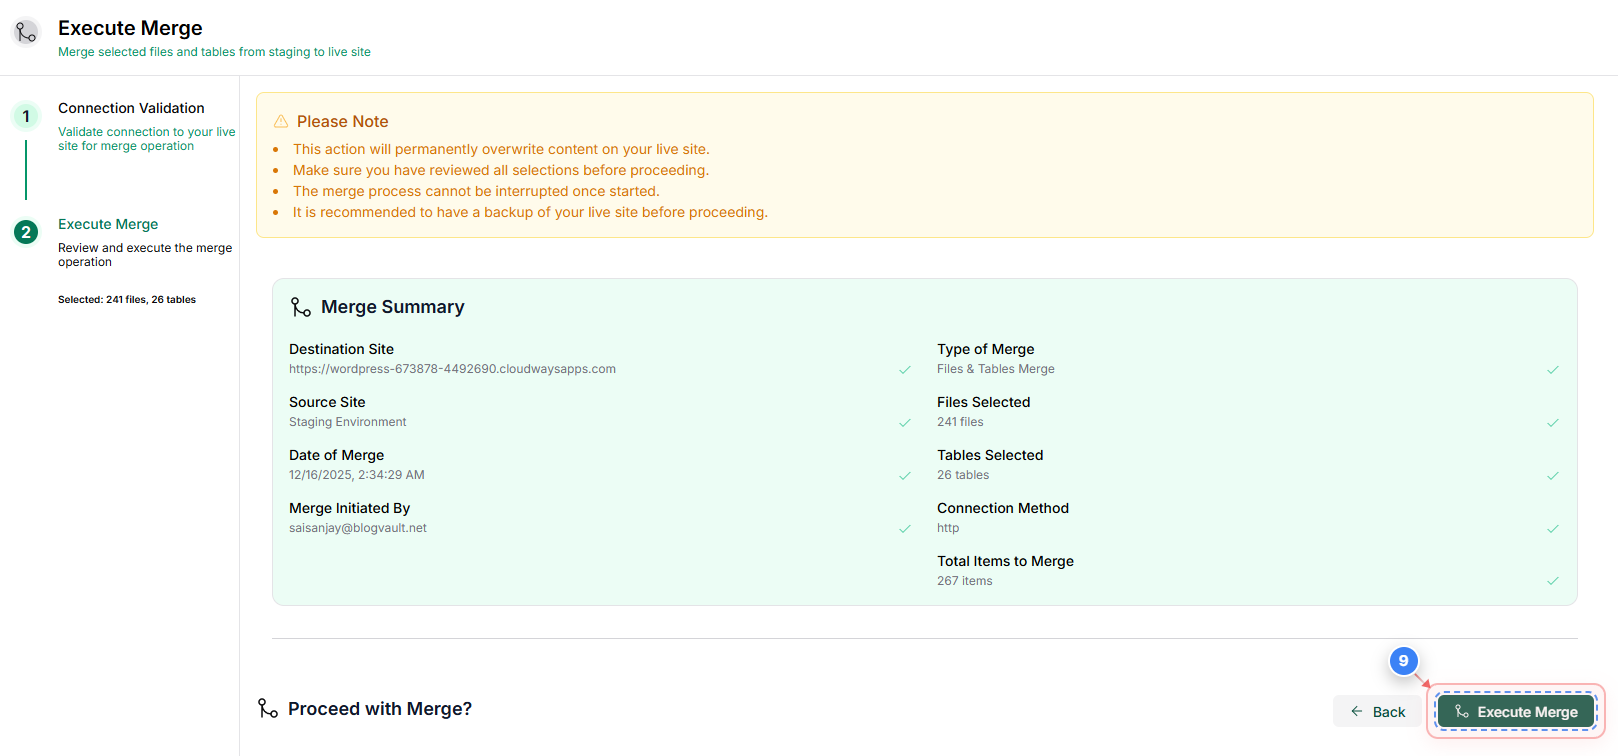
Execute the merge operation
Click the "Execute Merge" button at the bottom-right of the merge summary page to start merging the selected staging content into the live site.
Note: This action overwrites content on the live site. Ensure you have a recent backup before proceeding.
Step 10 of 10
Verify merge completion
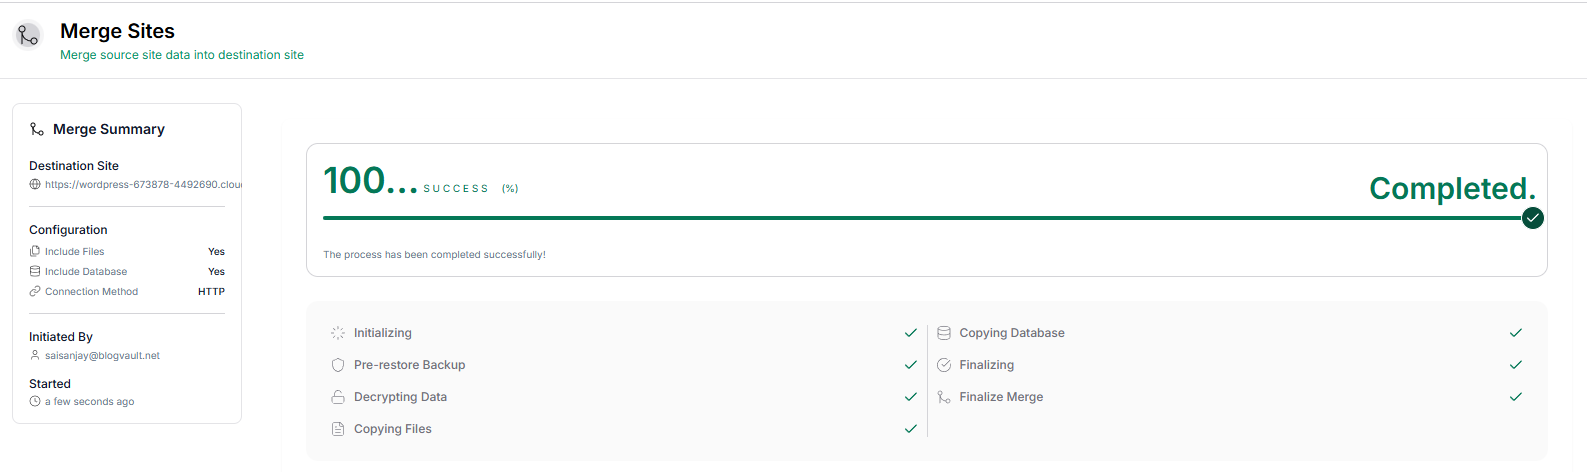
The merge task summary page shows the merge status, progress, and final result for files and database updates applied to the live site.
Note: Verify the status shows "Success" and review the activity log to confirm files and database steps completed without errors. After completion, check your live site to confirm the expected changes are visible.