How do I activate activity logs for my website?
Step 1 of 4
Open Your Site Overview
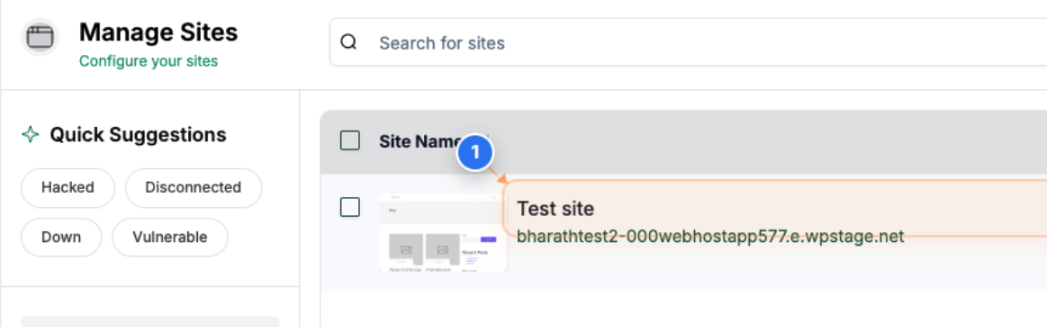
Click on your site name in the center of the Sites page to open its detailed overview and access management options.
Note: Verify the site URL below the name before clicking to ensure you are selecting the correct site.
Step 2 of 4
Access Activity Logs
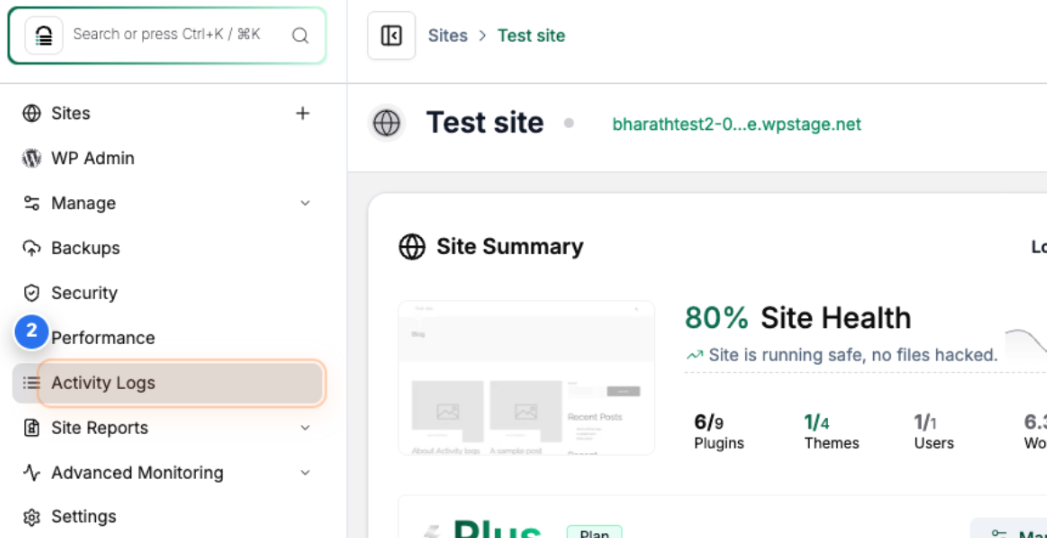
Click on 'Activity Logs' in the left sidebar to go to the activity logs page.
Note: This section helps you monitor activities such as content edits, plugin updates, or login attempts.
Step 3 of 4
Enable Activity Logs View
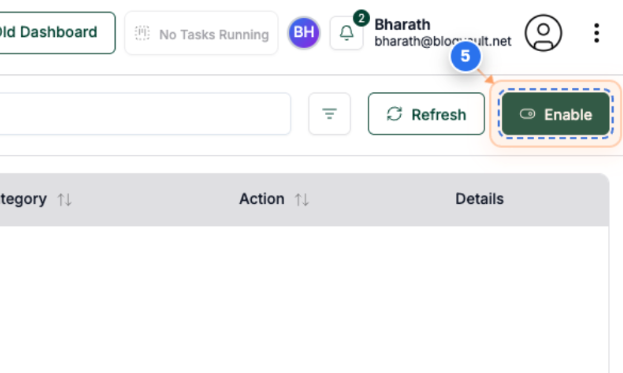
Click the enable button in the top-right corner of the Activity Logs page to activate logs for your site.
Note: This button may appear as an icon; once clicked, it refreshes the page to display the most recent activity entries.
Step 4 of 4
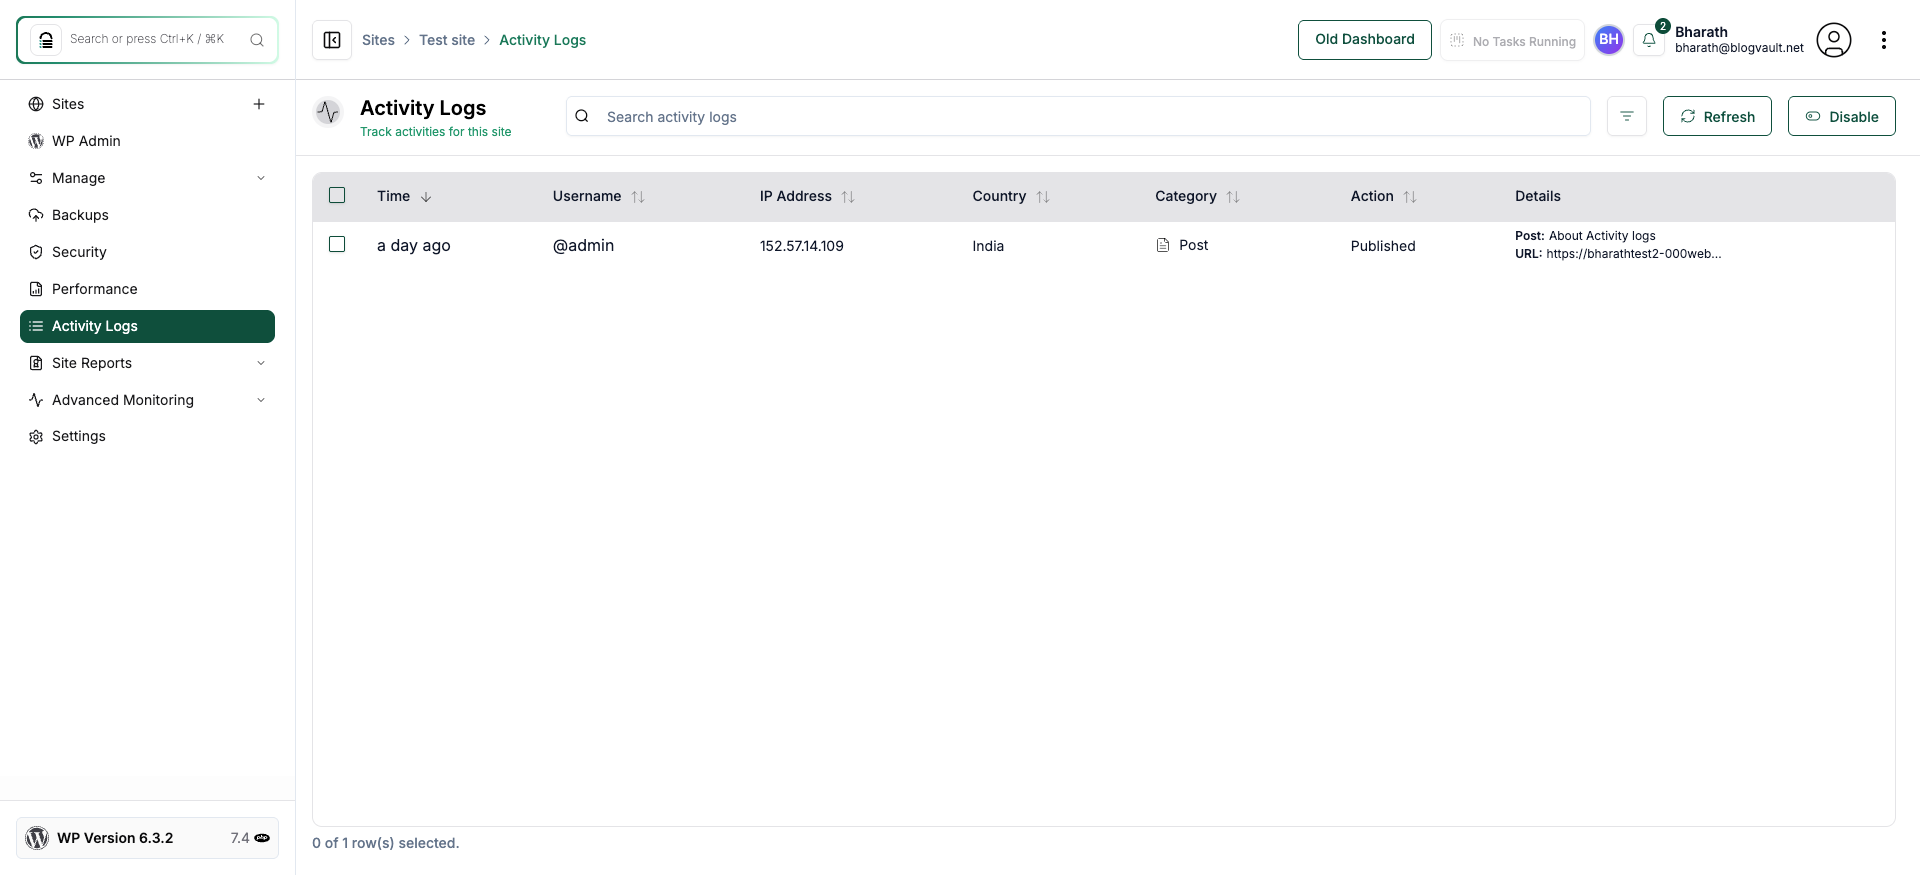
Review Site Activity Logs
Once the Activity logs are enabled, we will start recording the Activities performed on the website and show them here. The Activity Logs page provides a detailed overview of all recorded actions on your site, including the time of activity, username, IP address, country, category, and specific actions like post publications or updates.
Note: Use this data to identify any unusual activity or confirm recent legitimate actions. The table allows sorting and filtering by category or user for efficient review.