What Is Geo-Blocking and How Can I Use It to Block IPs from Specific Countries?
You can use the Geo Blocking feature to restrict access to your site from certain countries. This helps protect your site from unwanted or suspicious traffic. You can set up Geo-blocking following the steps below.
Step 1 of 8
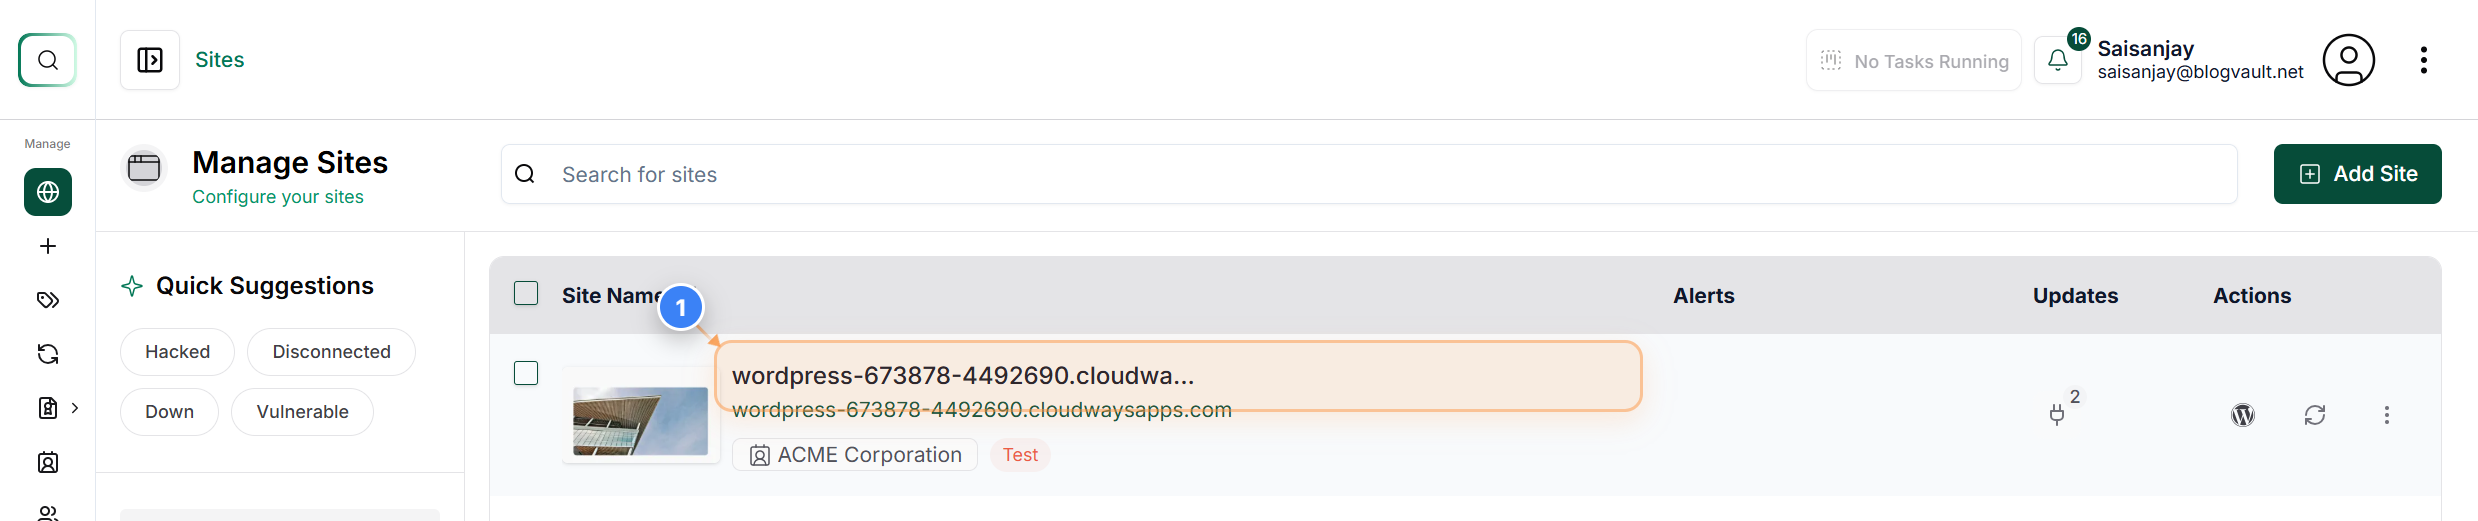
Open Site Management
Click on your site name in the main sites list to open the site management page.
Note: This takes you to your site's dashboard, where you can manage settings and features.
Step 2 of 8
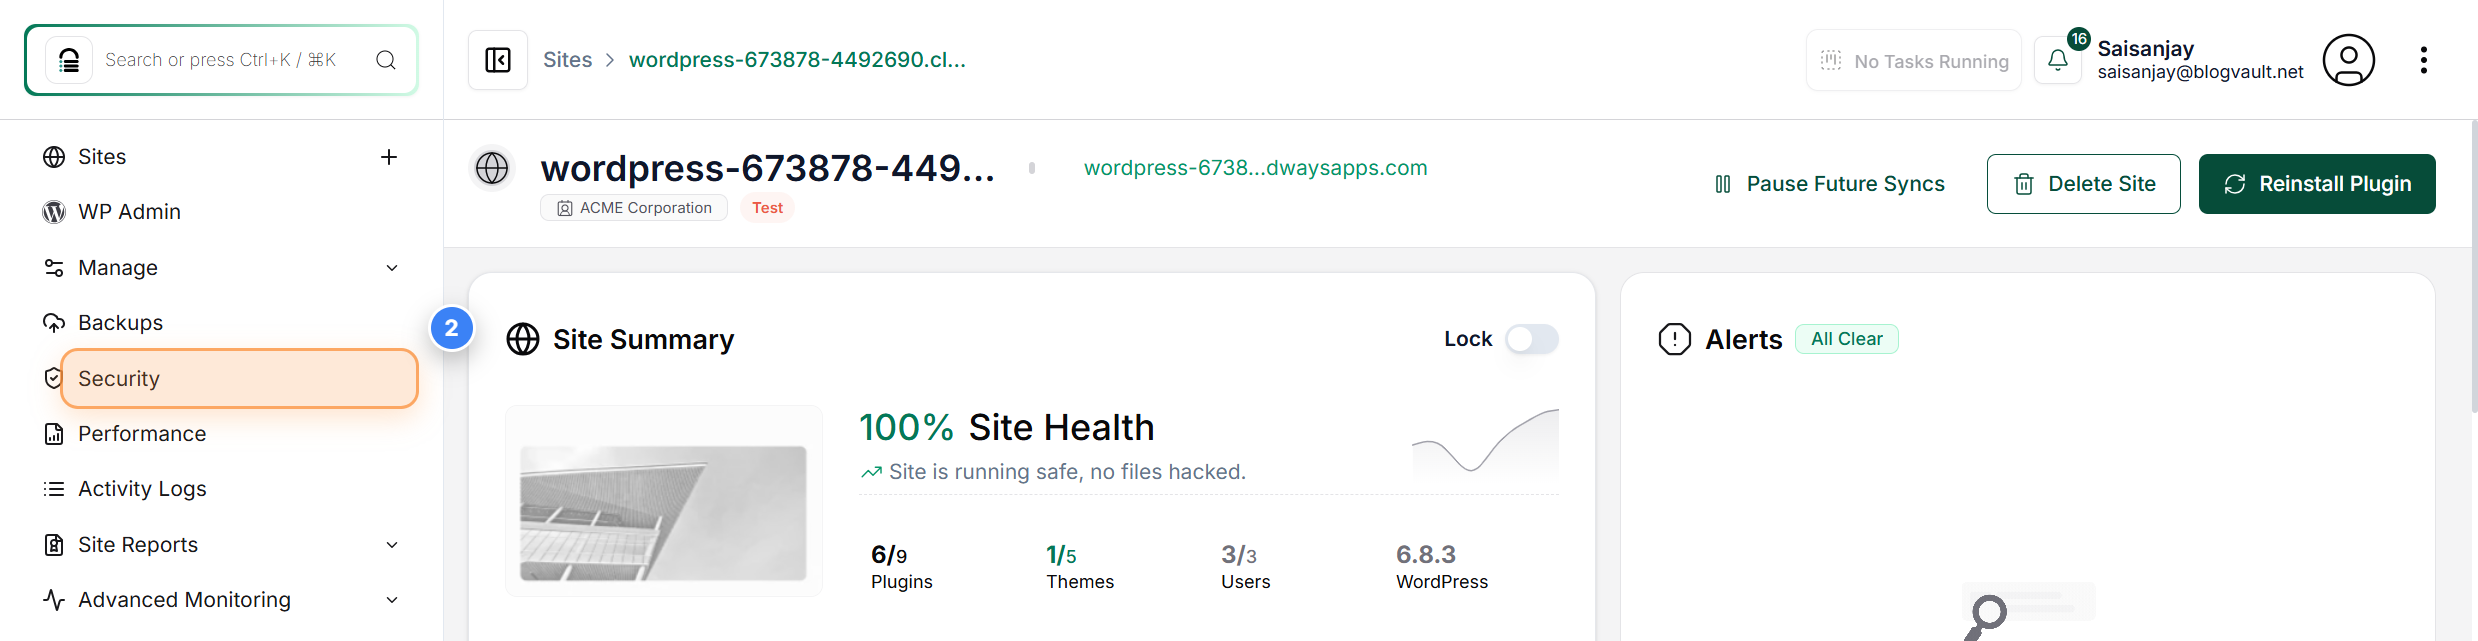
Access Security Settings
Click the Security option in the left sidebar to view your site's security configuration and tools.
Note: This section includes firewall, malware protection, and other security-related settings.
Step 3 of 8
Open Geo-Blocking Settings
Click the Geo Blocking button on the right side of the page to manage country-level access restrictions.
Note: This lets you configure which countries can or cannot access your website.
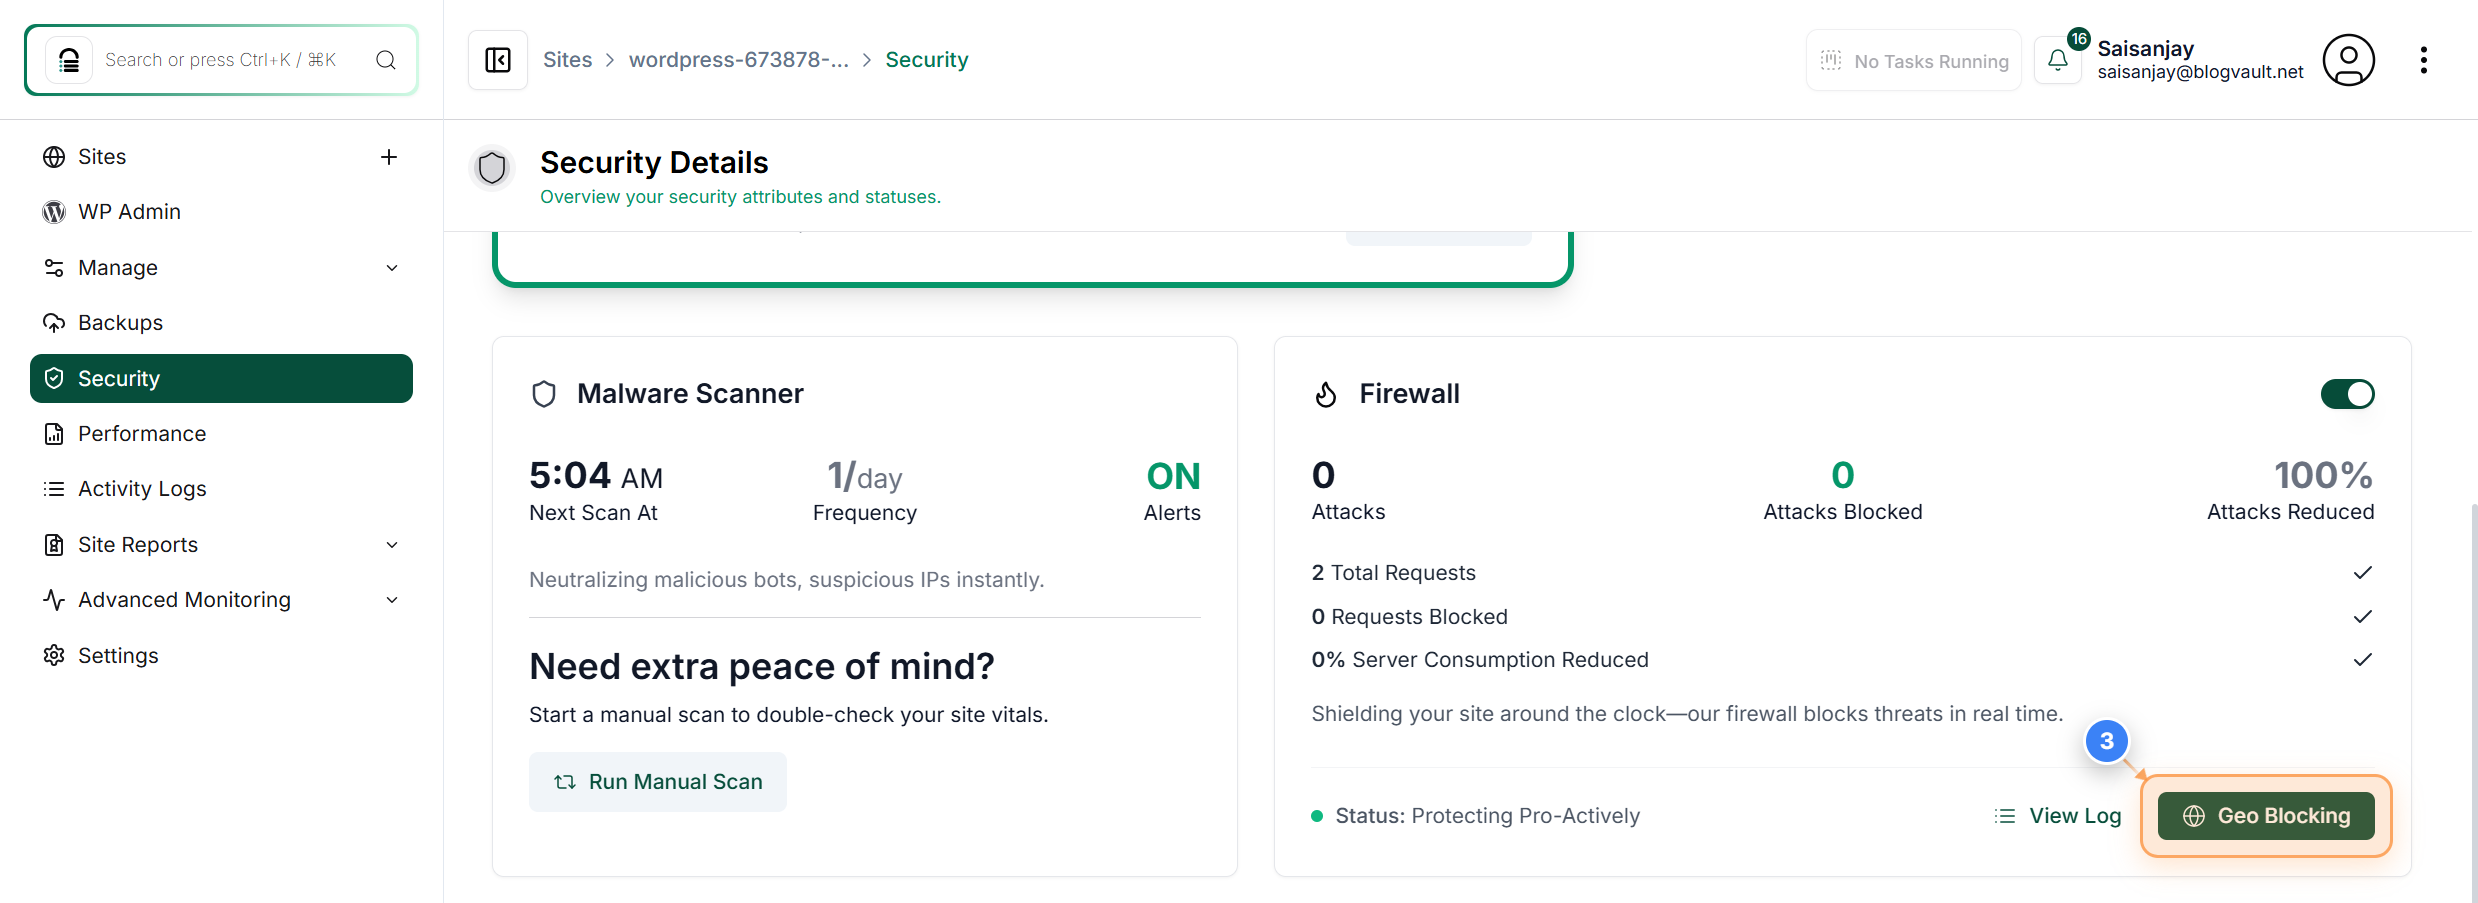
Step 4 of 8
Start Blocking Countries
Click the Block Countries button in the center of the page to begin setting up country restrictions.
Note: If no countries are blocked yet, this button helps you create your first block list.
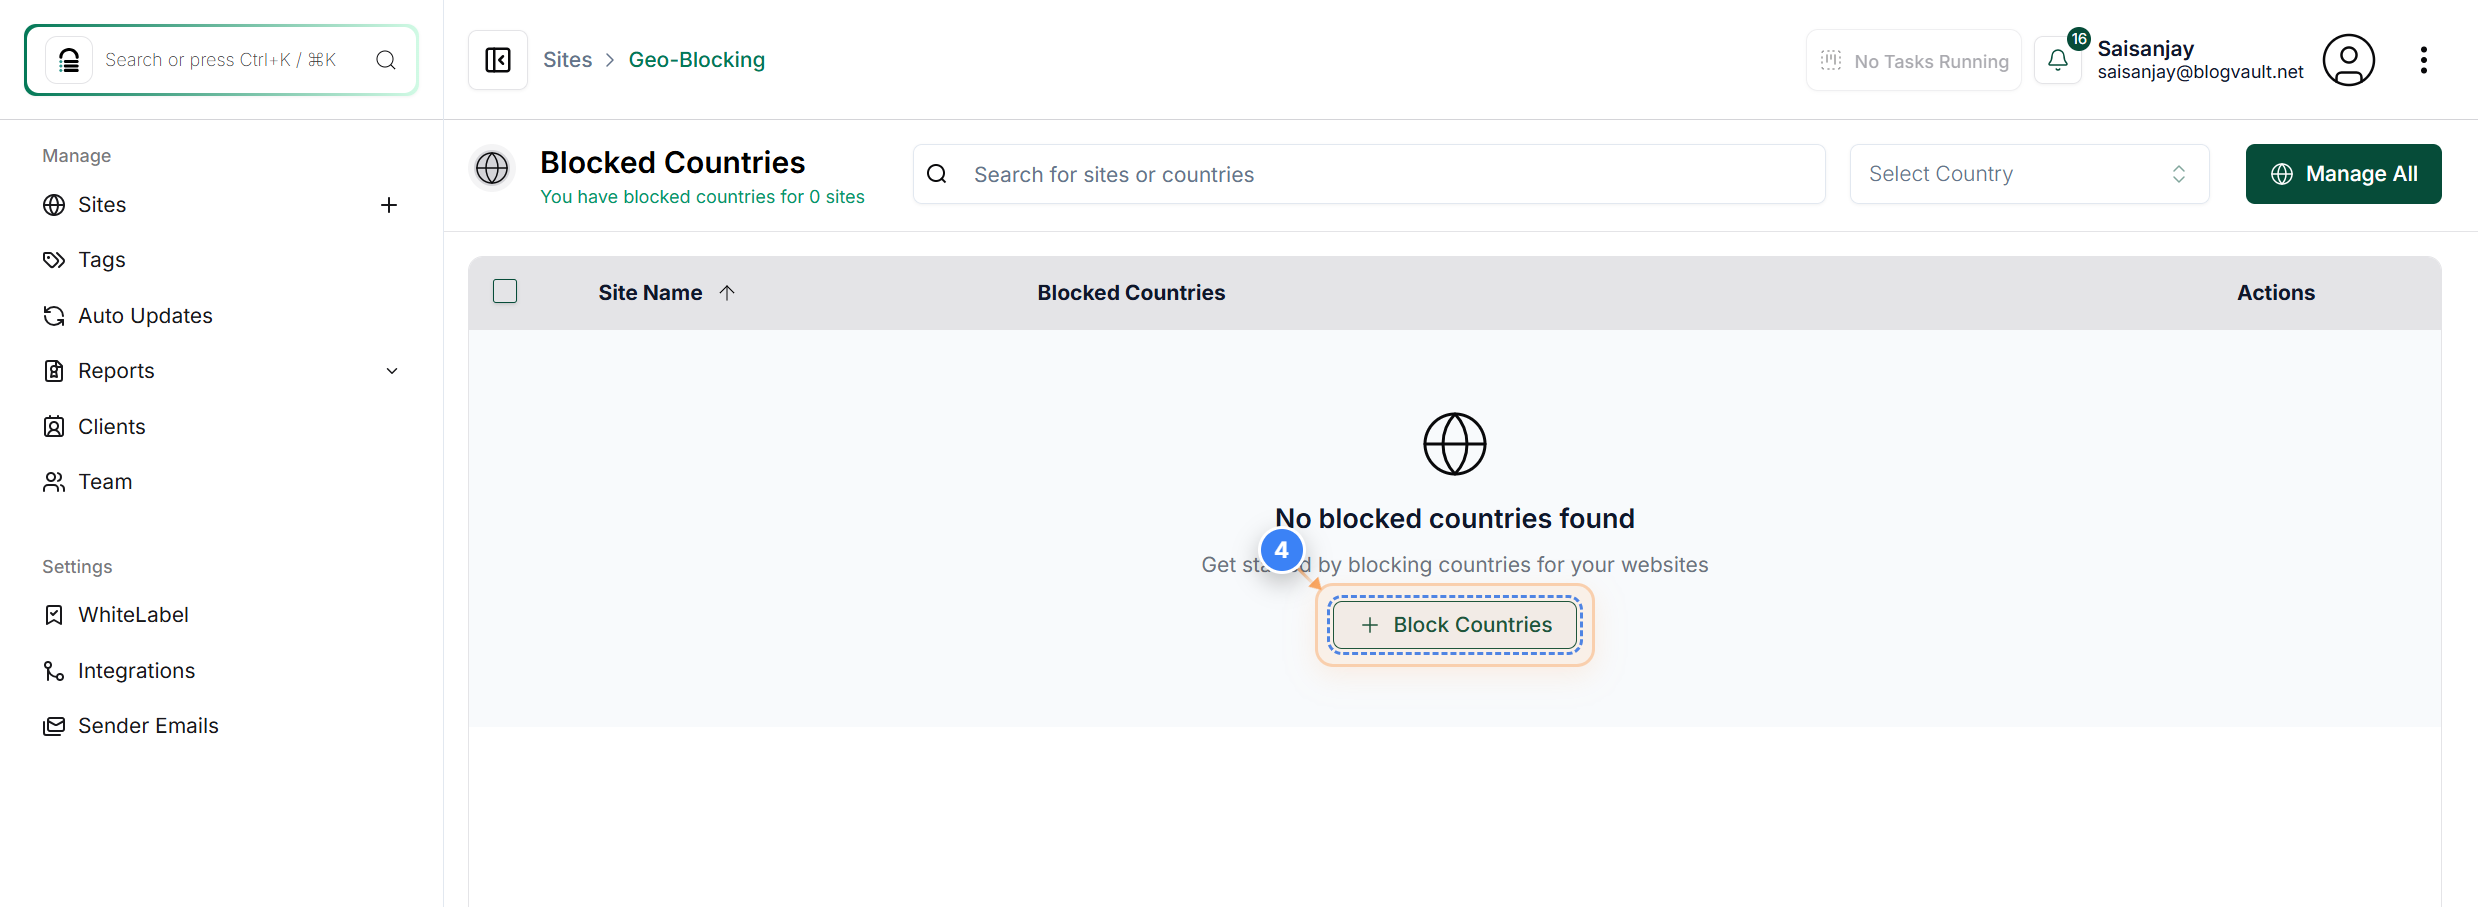
Step 5 of 8
Select Country to Block
Select desired countries(s) in the country list
Note: You can select multiple countries before applying the block action.
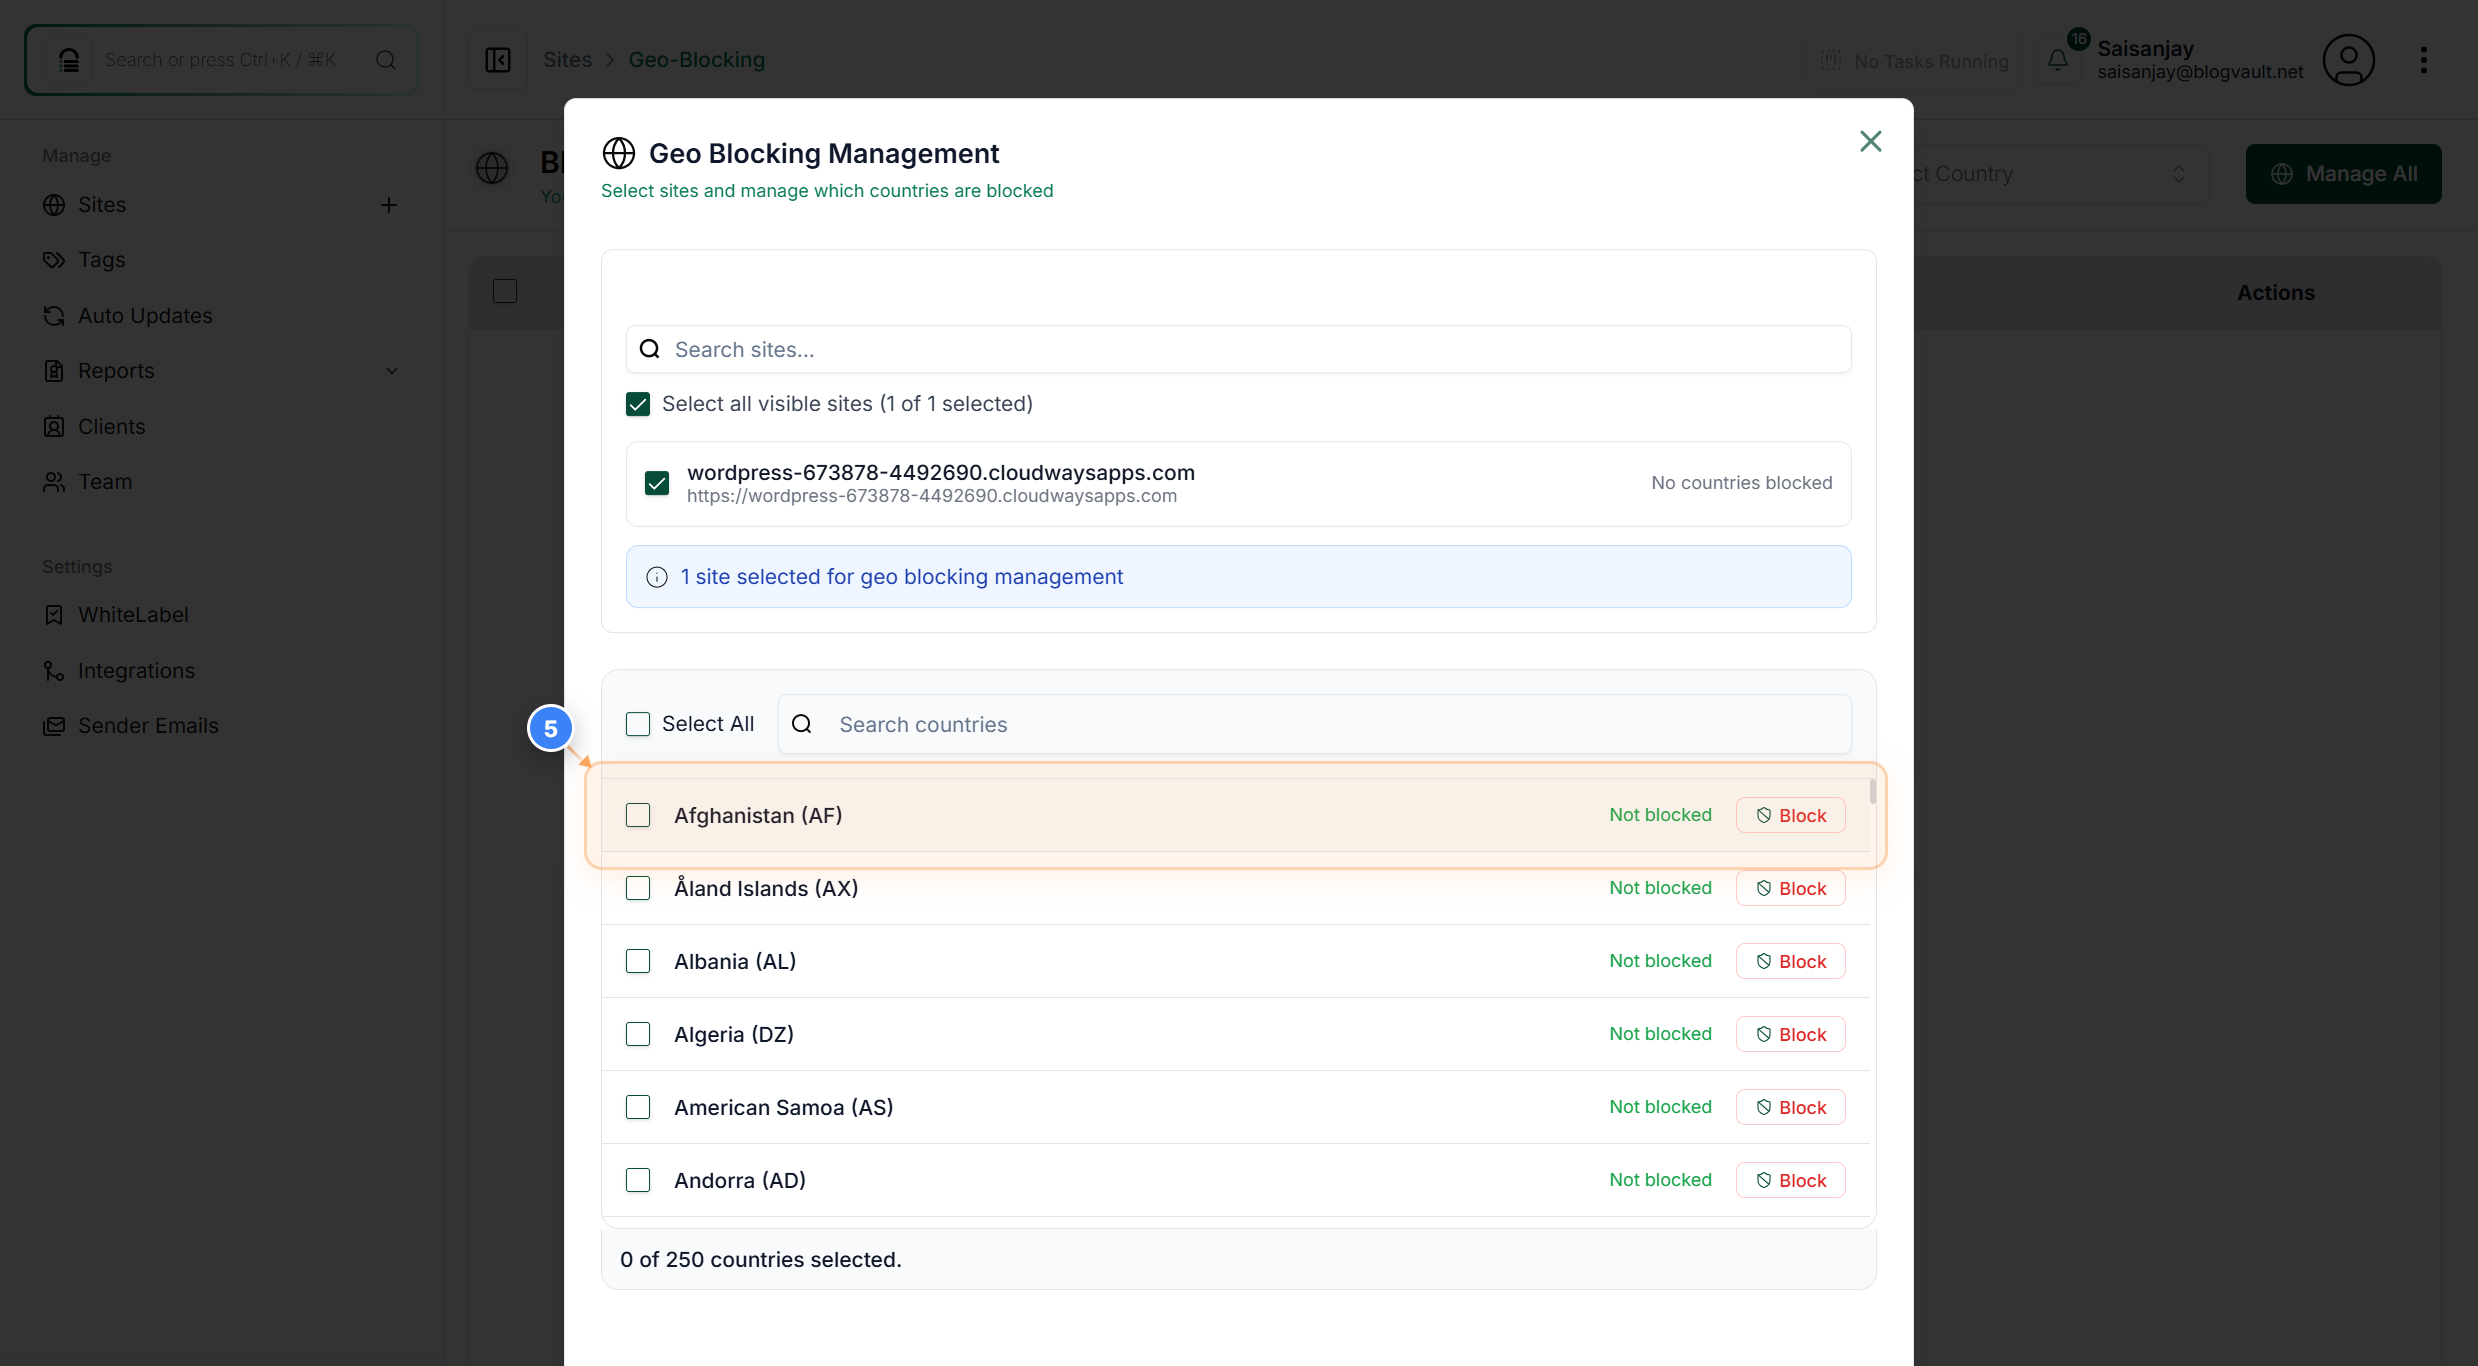
Step 6 of 8
Apply Blocking Changes
Click the Block Selected button at the bottom of the page to confirm your selected countries for blocking.
Note: A confirmation dialog will appear before finalizing the block.
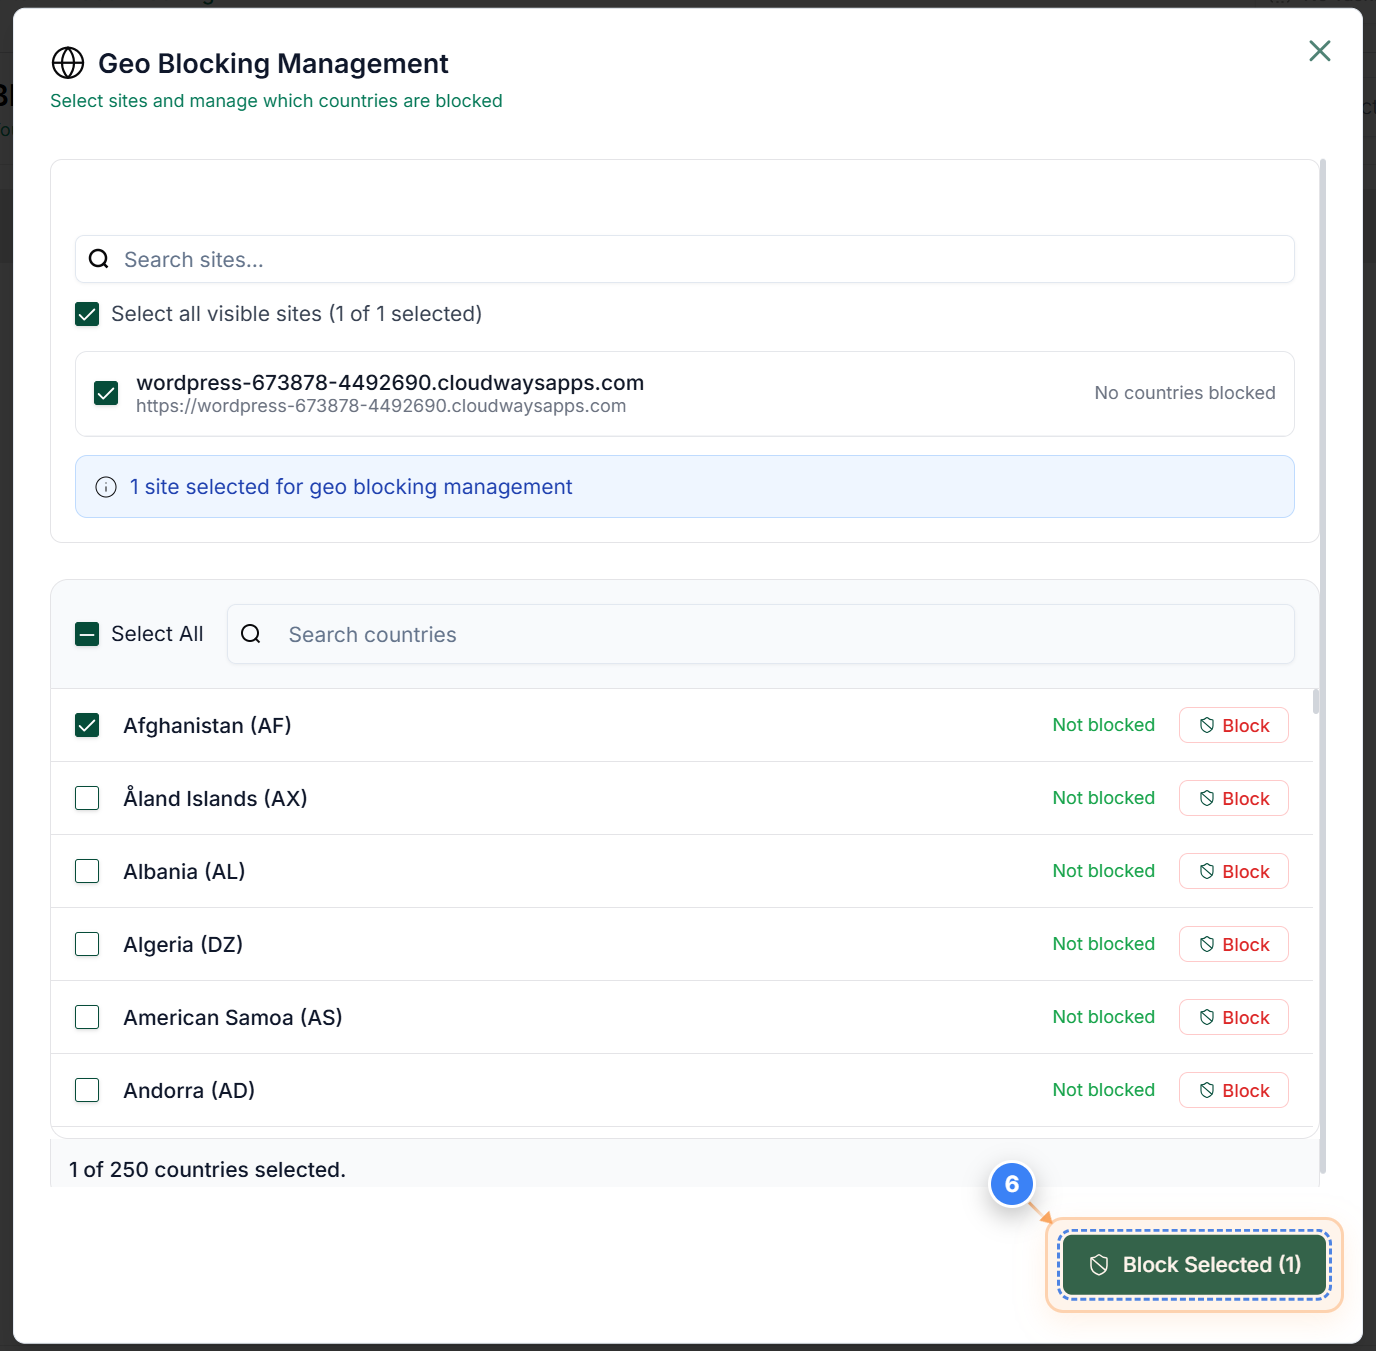
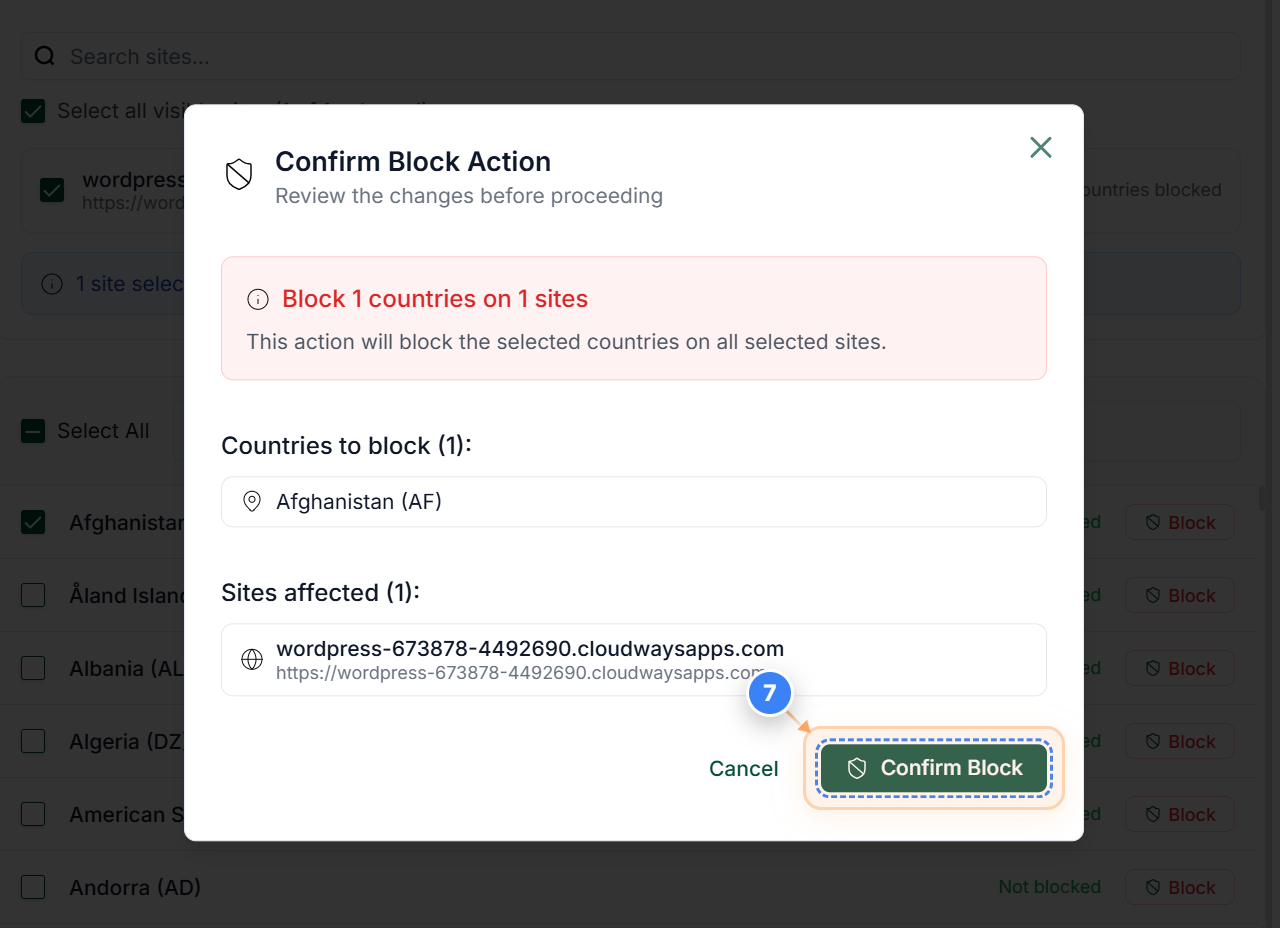
Step 7 of 8
Confirm Country Block
Click the Confirm Block button in the confirmation dialog to finalize your changes.
Note: This ensures the selected countries are blocked across all chosen sites.
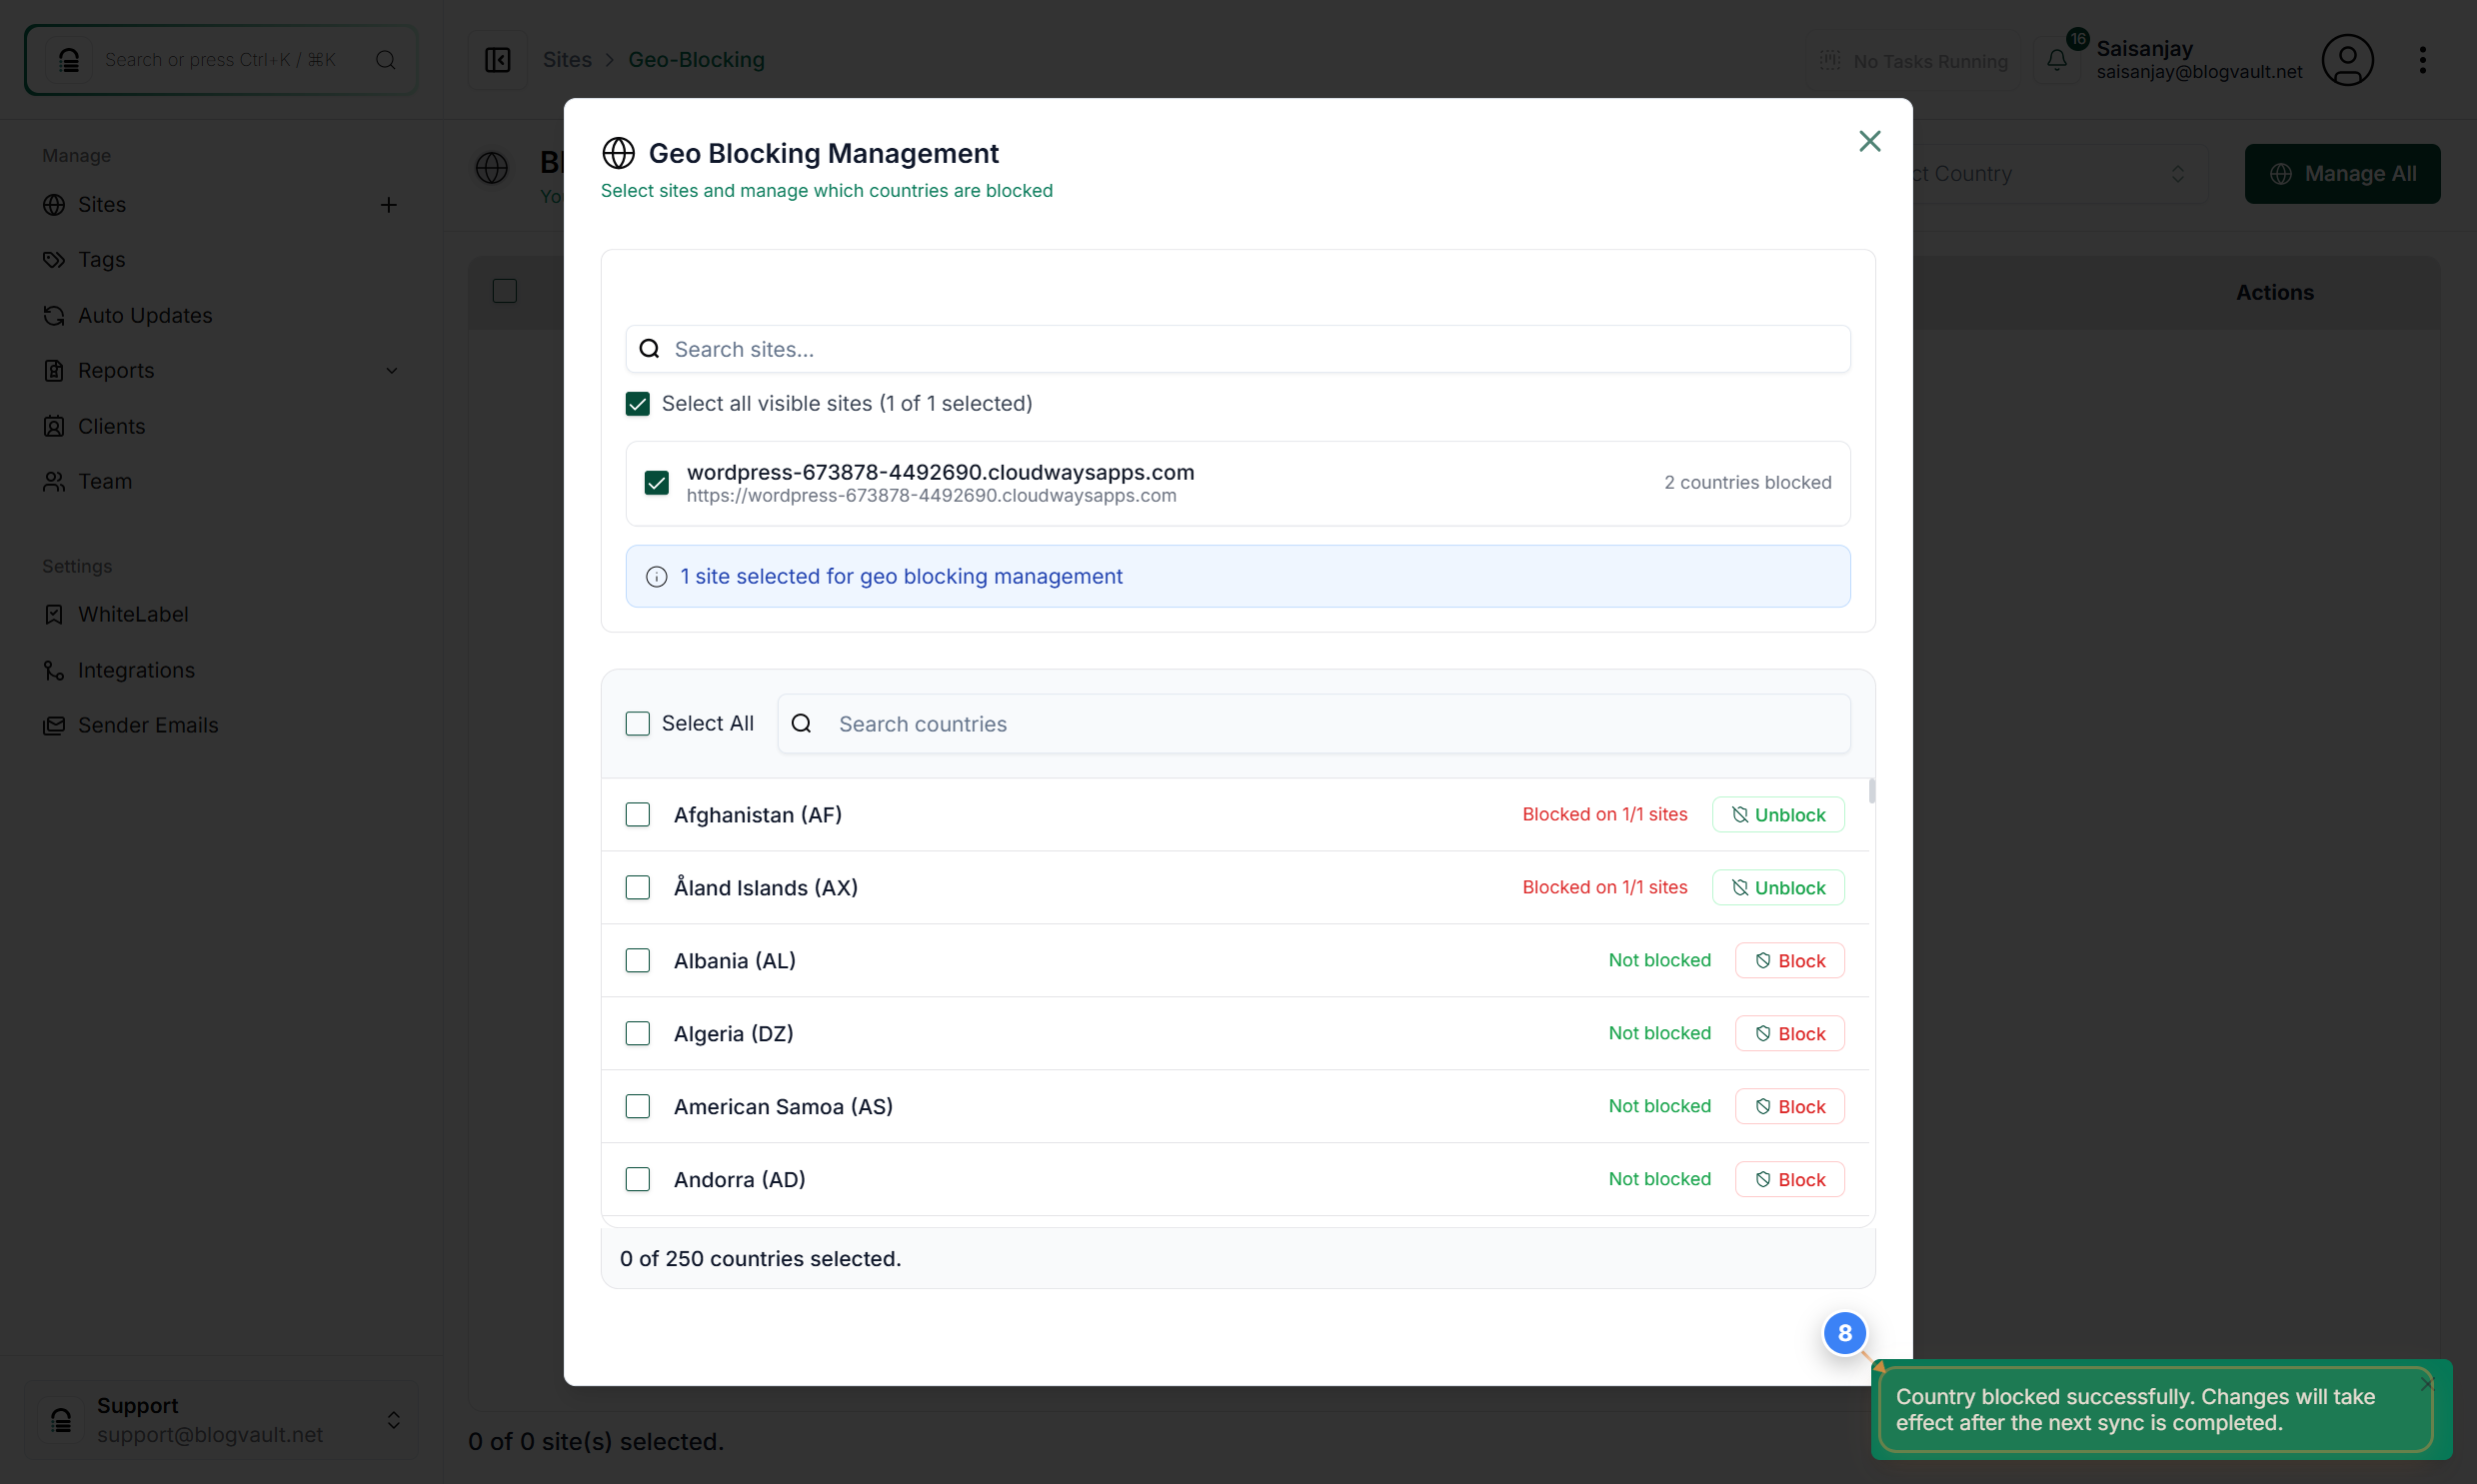
Step 8 of 8
Success Notification
You will see a success message confirming that the country was blocked successfully.
Note: You can block multiple countries or unblock countries from the same screen