How Do I Re-Assign or Modify Clients’ Access to Their Sites on the Dashboard?
Step 1 of 4
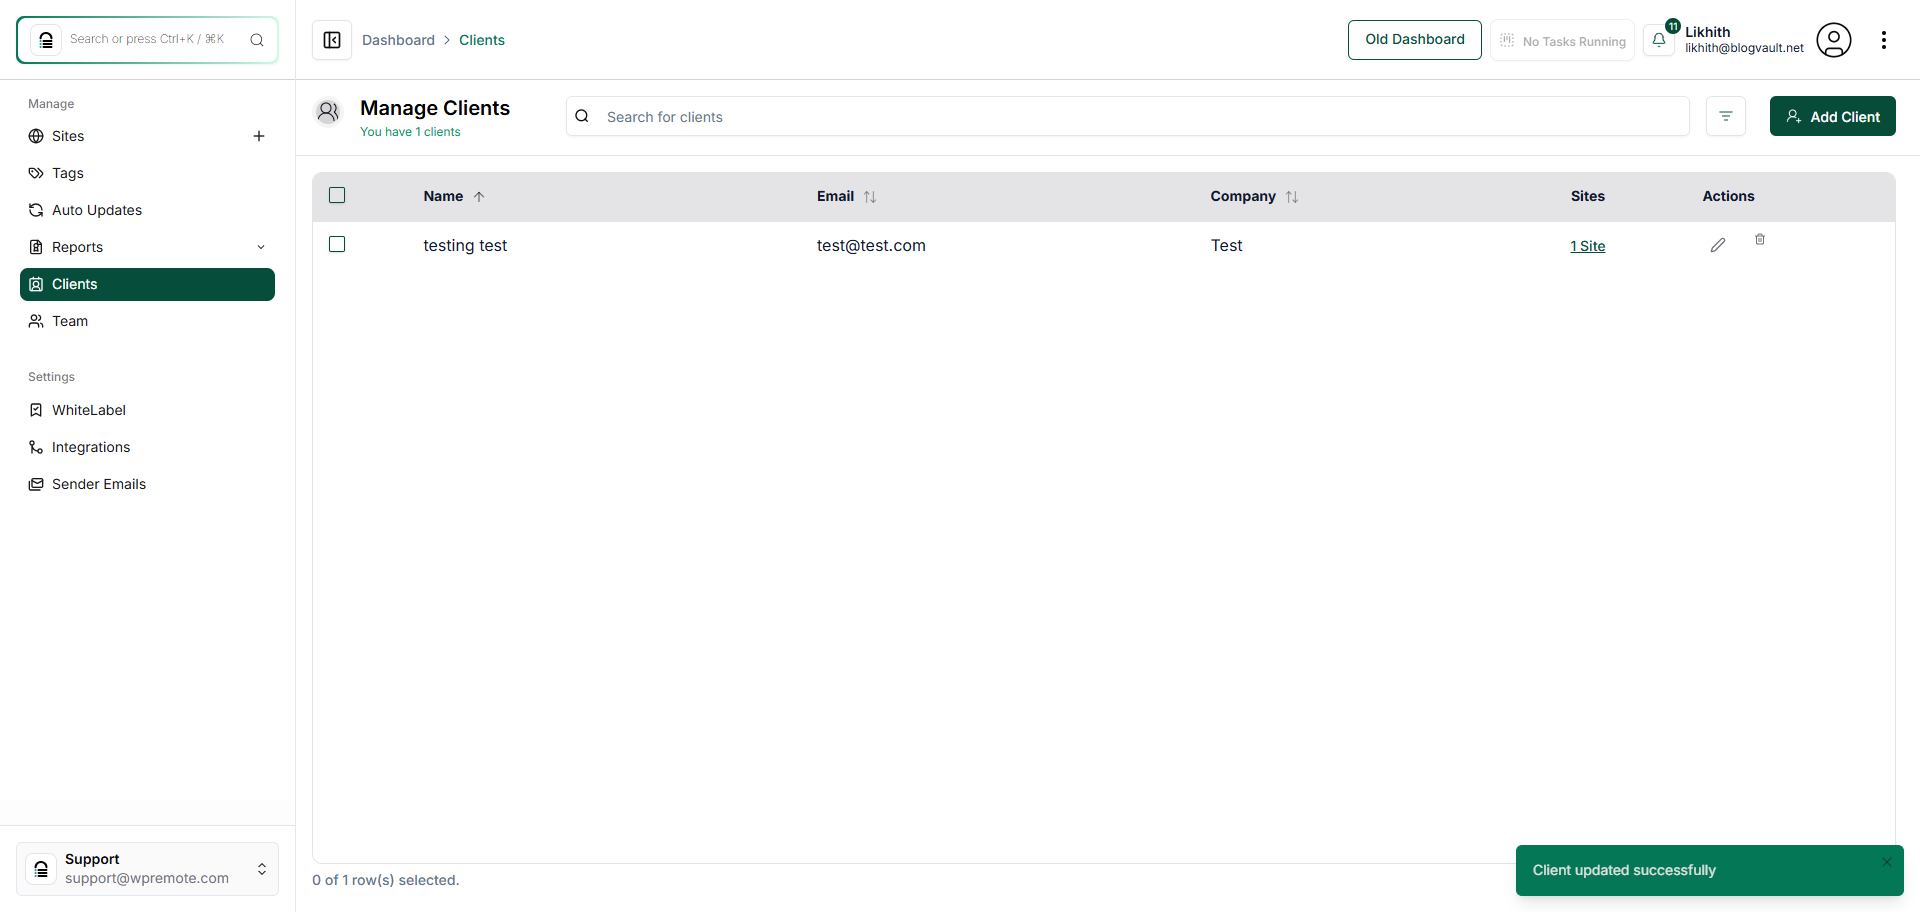
Open the Clients Section
Click on 'Clients' in the left sidebar to access the list of clients linked to your account.
Note: This section allows you to manage, edit, and organize your client profiles and their associated sites.
Step 2 of 4
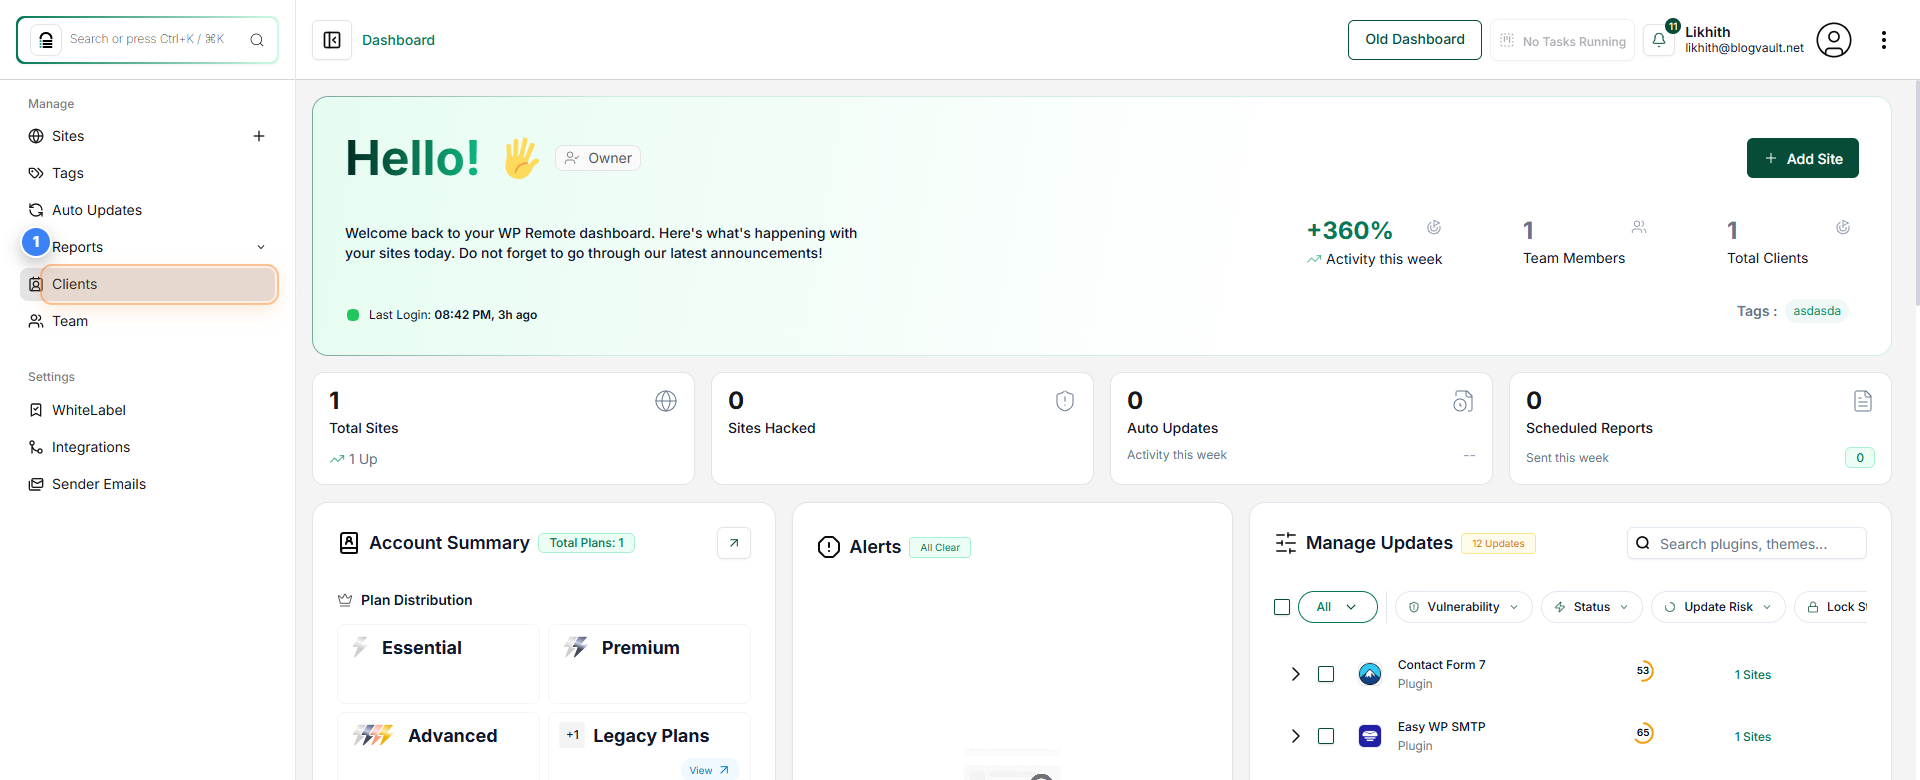
Edit Client Information
Click the edit icon next to the desired client name in the Clients table to open that client's details page.
Note: Use this page to modify client information such as name, email, or company details before saving your changes.
Step 3 of 4
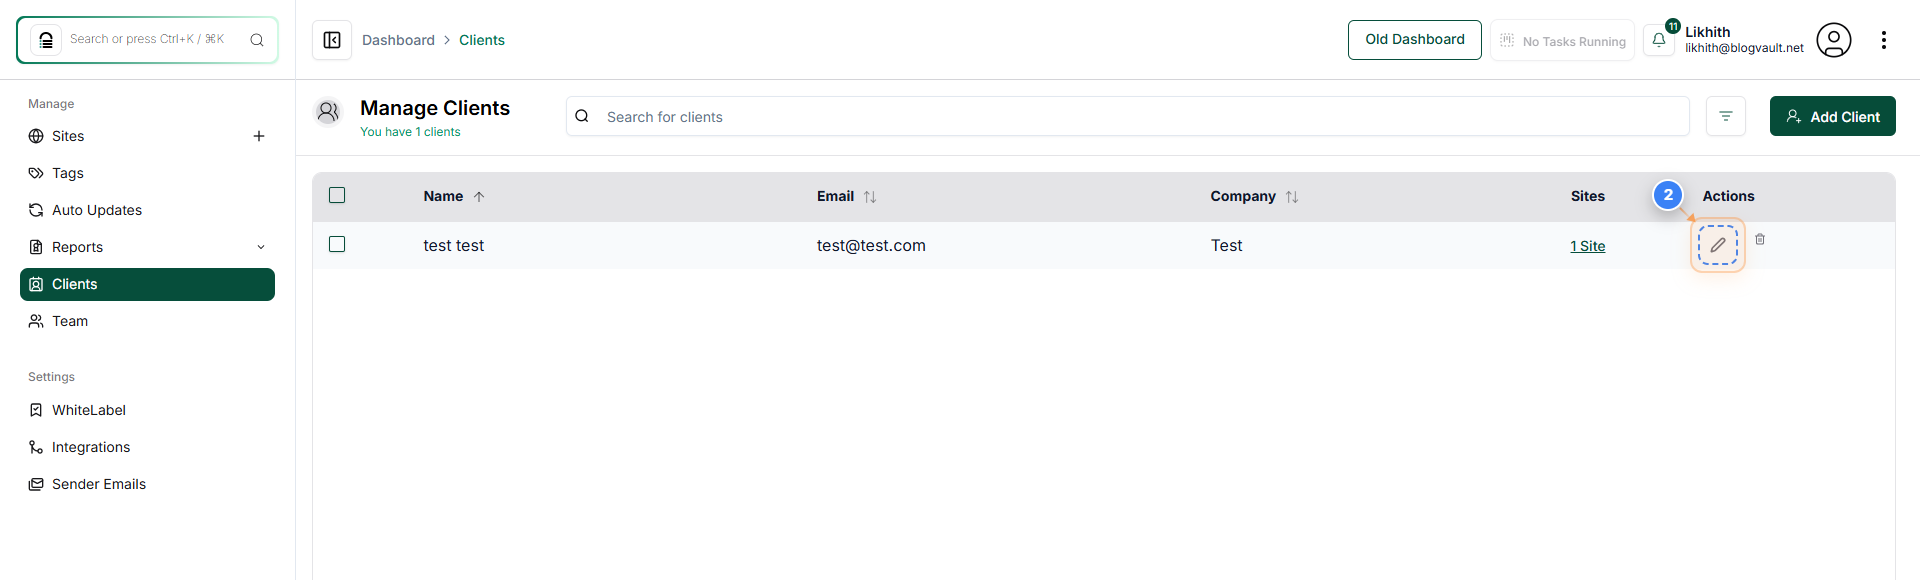
Save Updated Client Details
Click the 'Update Client' button at the bottom of the client details page to save the new information.
Note: Ensure that all required fields, such as 'First Name', are filled in correctly before saving.
Step 4 of 4
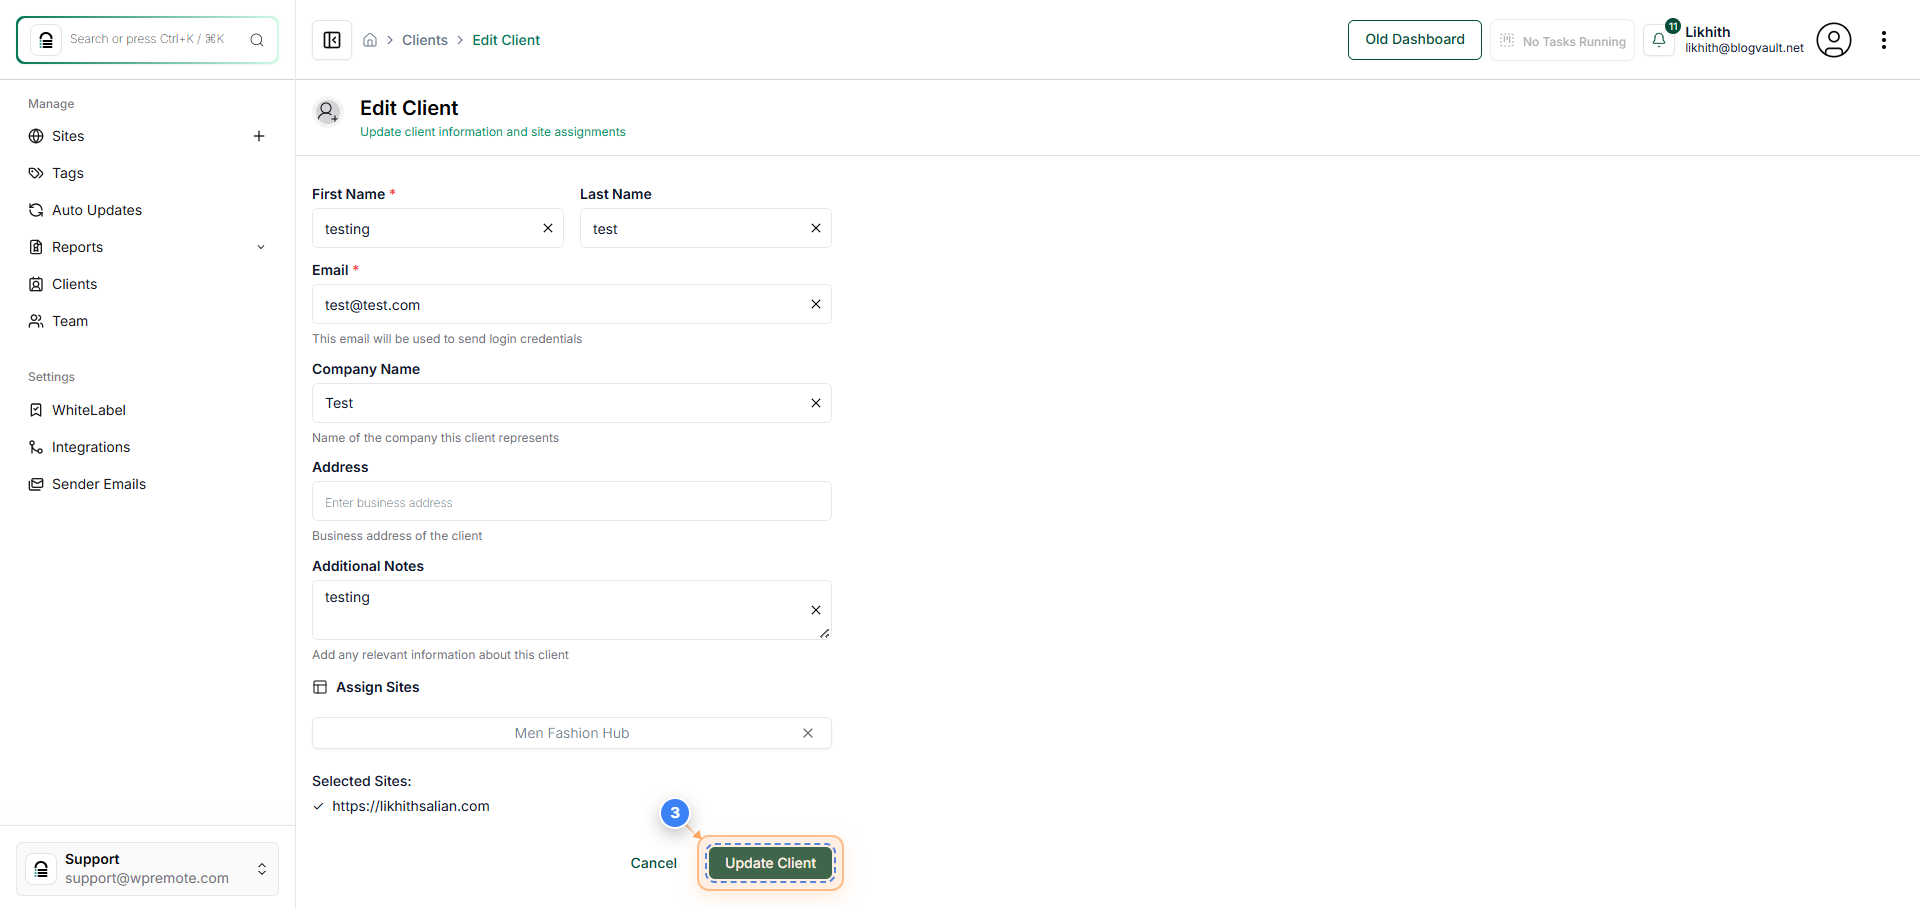
Verify Client Update
After saving, review the Clients page to confirm that your updates appear correctly and a 'Client updated successfully' message is displayed.
Note: If the confirmation message doesn't appear, refresh the page or recheck the mandatory fields before resubmitting the form.