How to Export and Upload Website Backups to Google Drive
Step 1 of 10
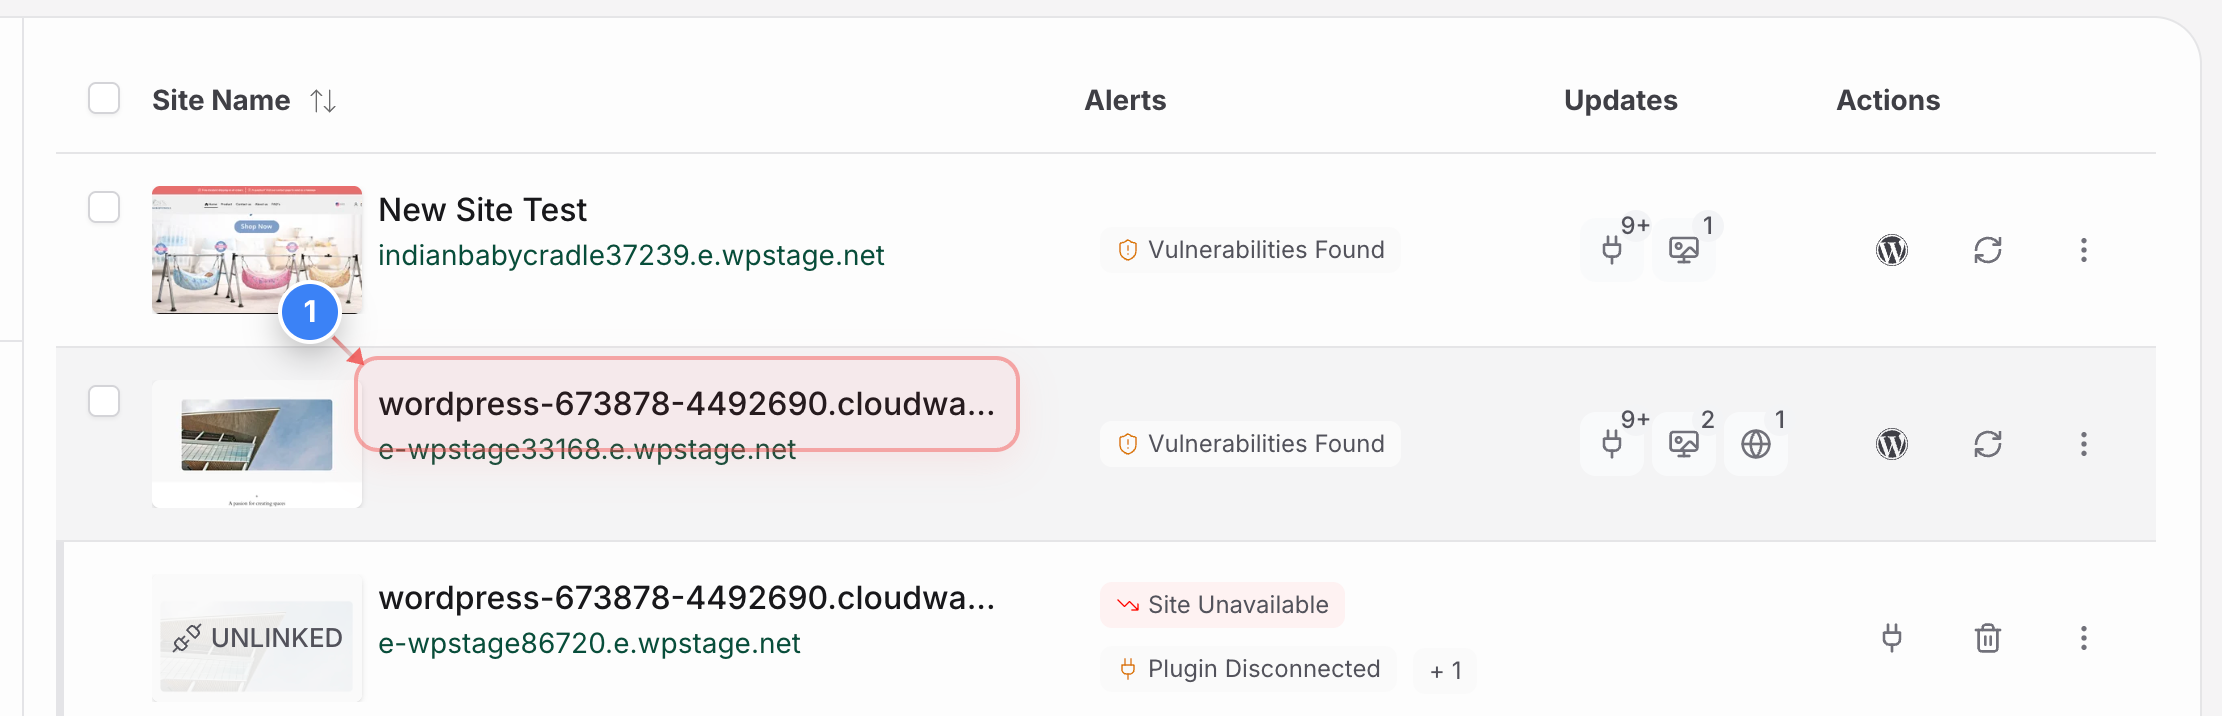
Select Your Site
Click on your site name from the site listing page to open site management options.
Note: This will open the site's individual overview dashboard containing all the site details.
Step 2 of 10
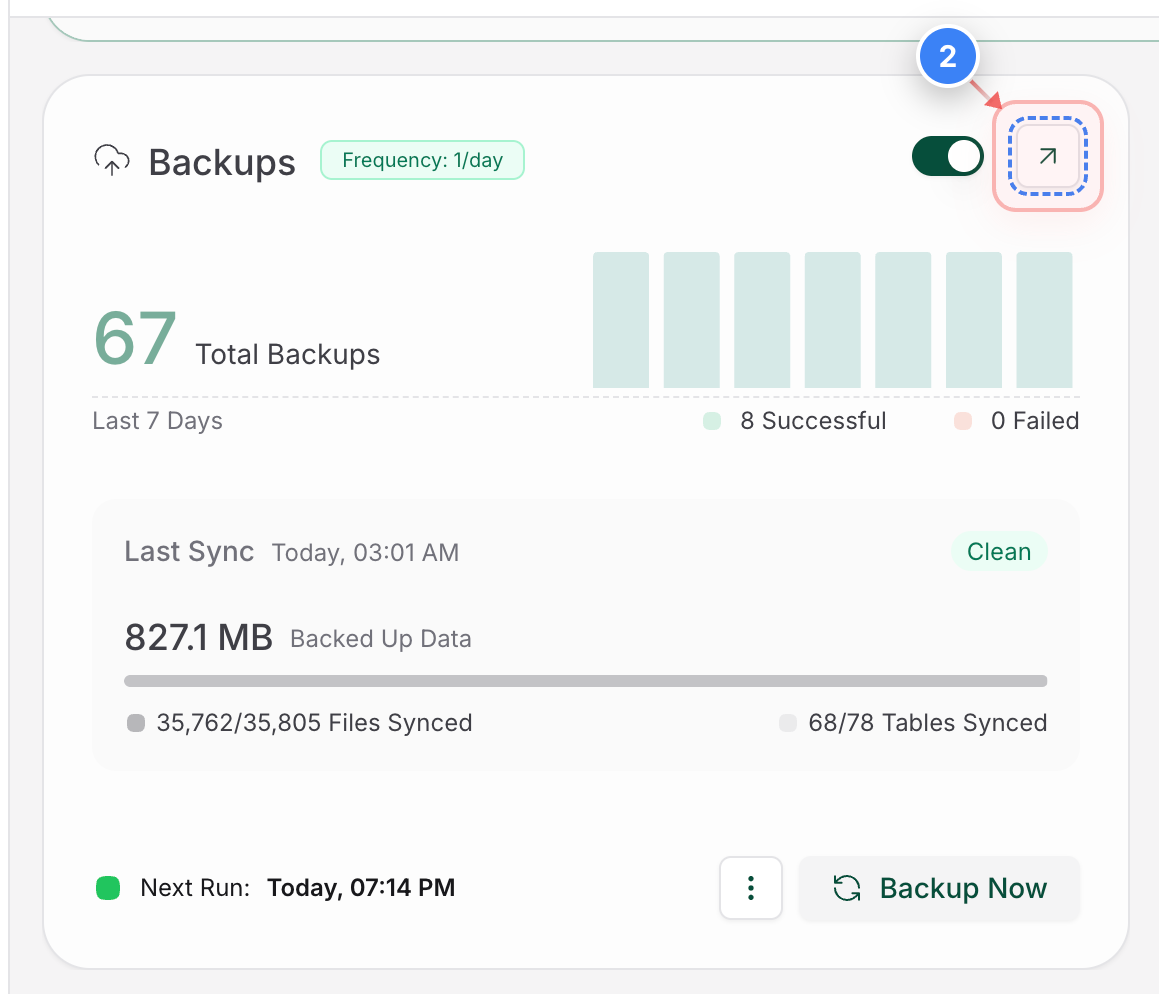
Open Backup Details
Click on the arrow within the Backups card to open the backup details page
Note: This section has all these details related to backup & features for backup related services
Step 3 of 10
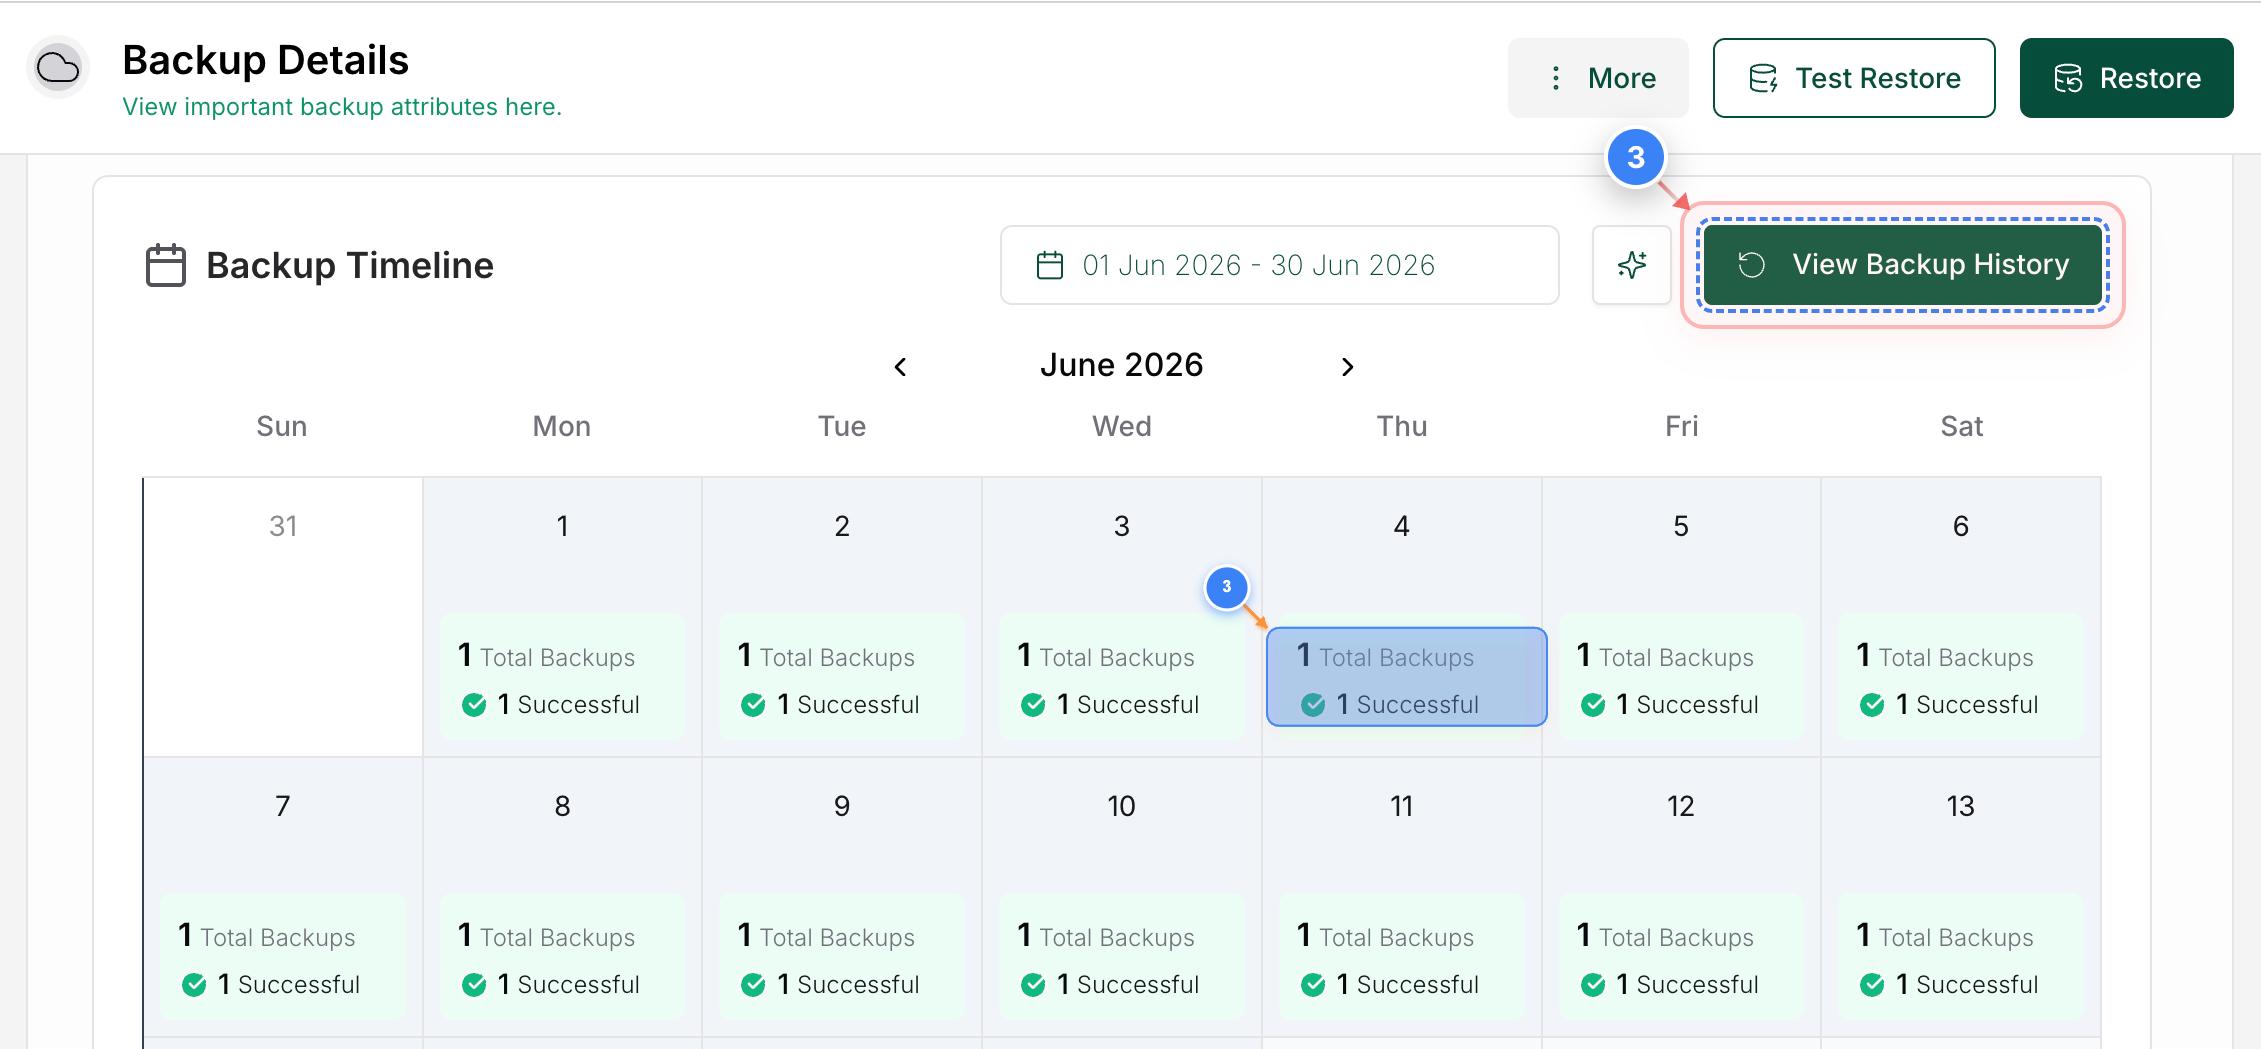
View Backup History
Click the View Backup History button on the right side of the Backup Timeline panel to open the historical archive of all snapshots.
Note: You can also pick individual backup instances directly from the Backup Timeline shown there.
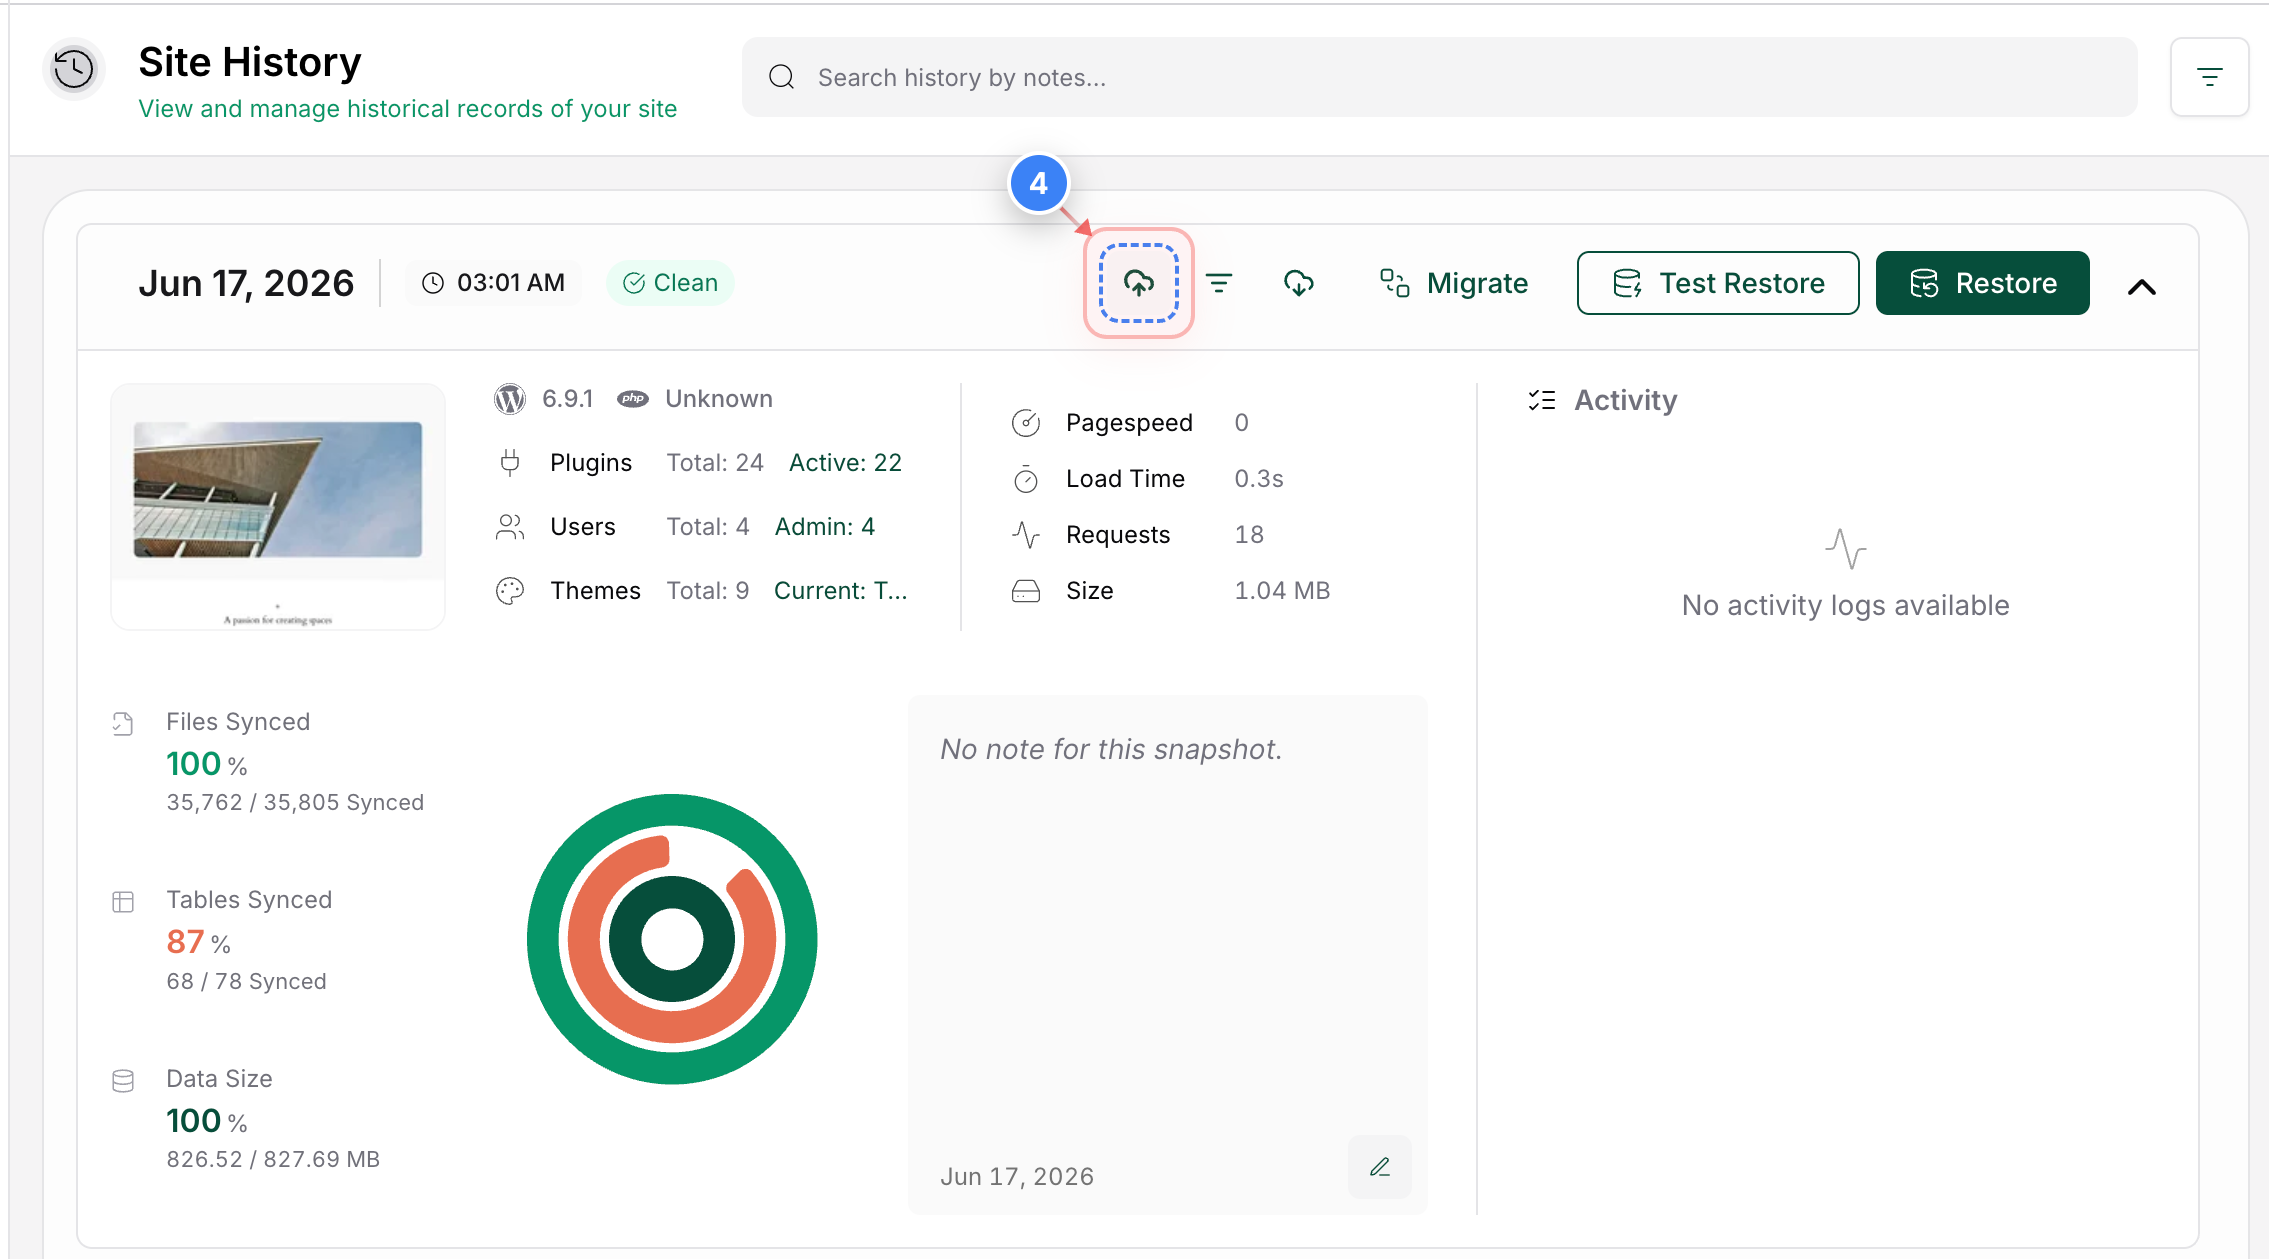
Step 4 of 10
Initialize Backup Upload
Click the Upload Backup button in the backup history timeline to open the destination setup screen
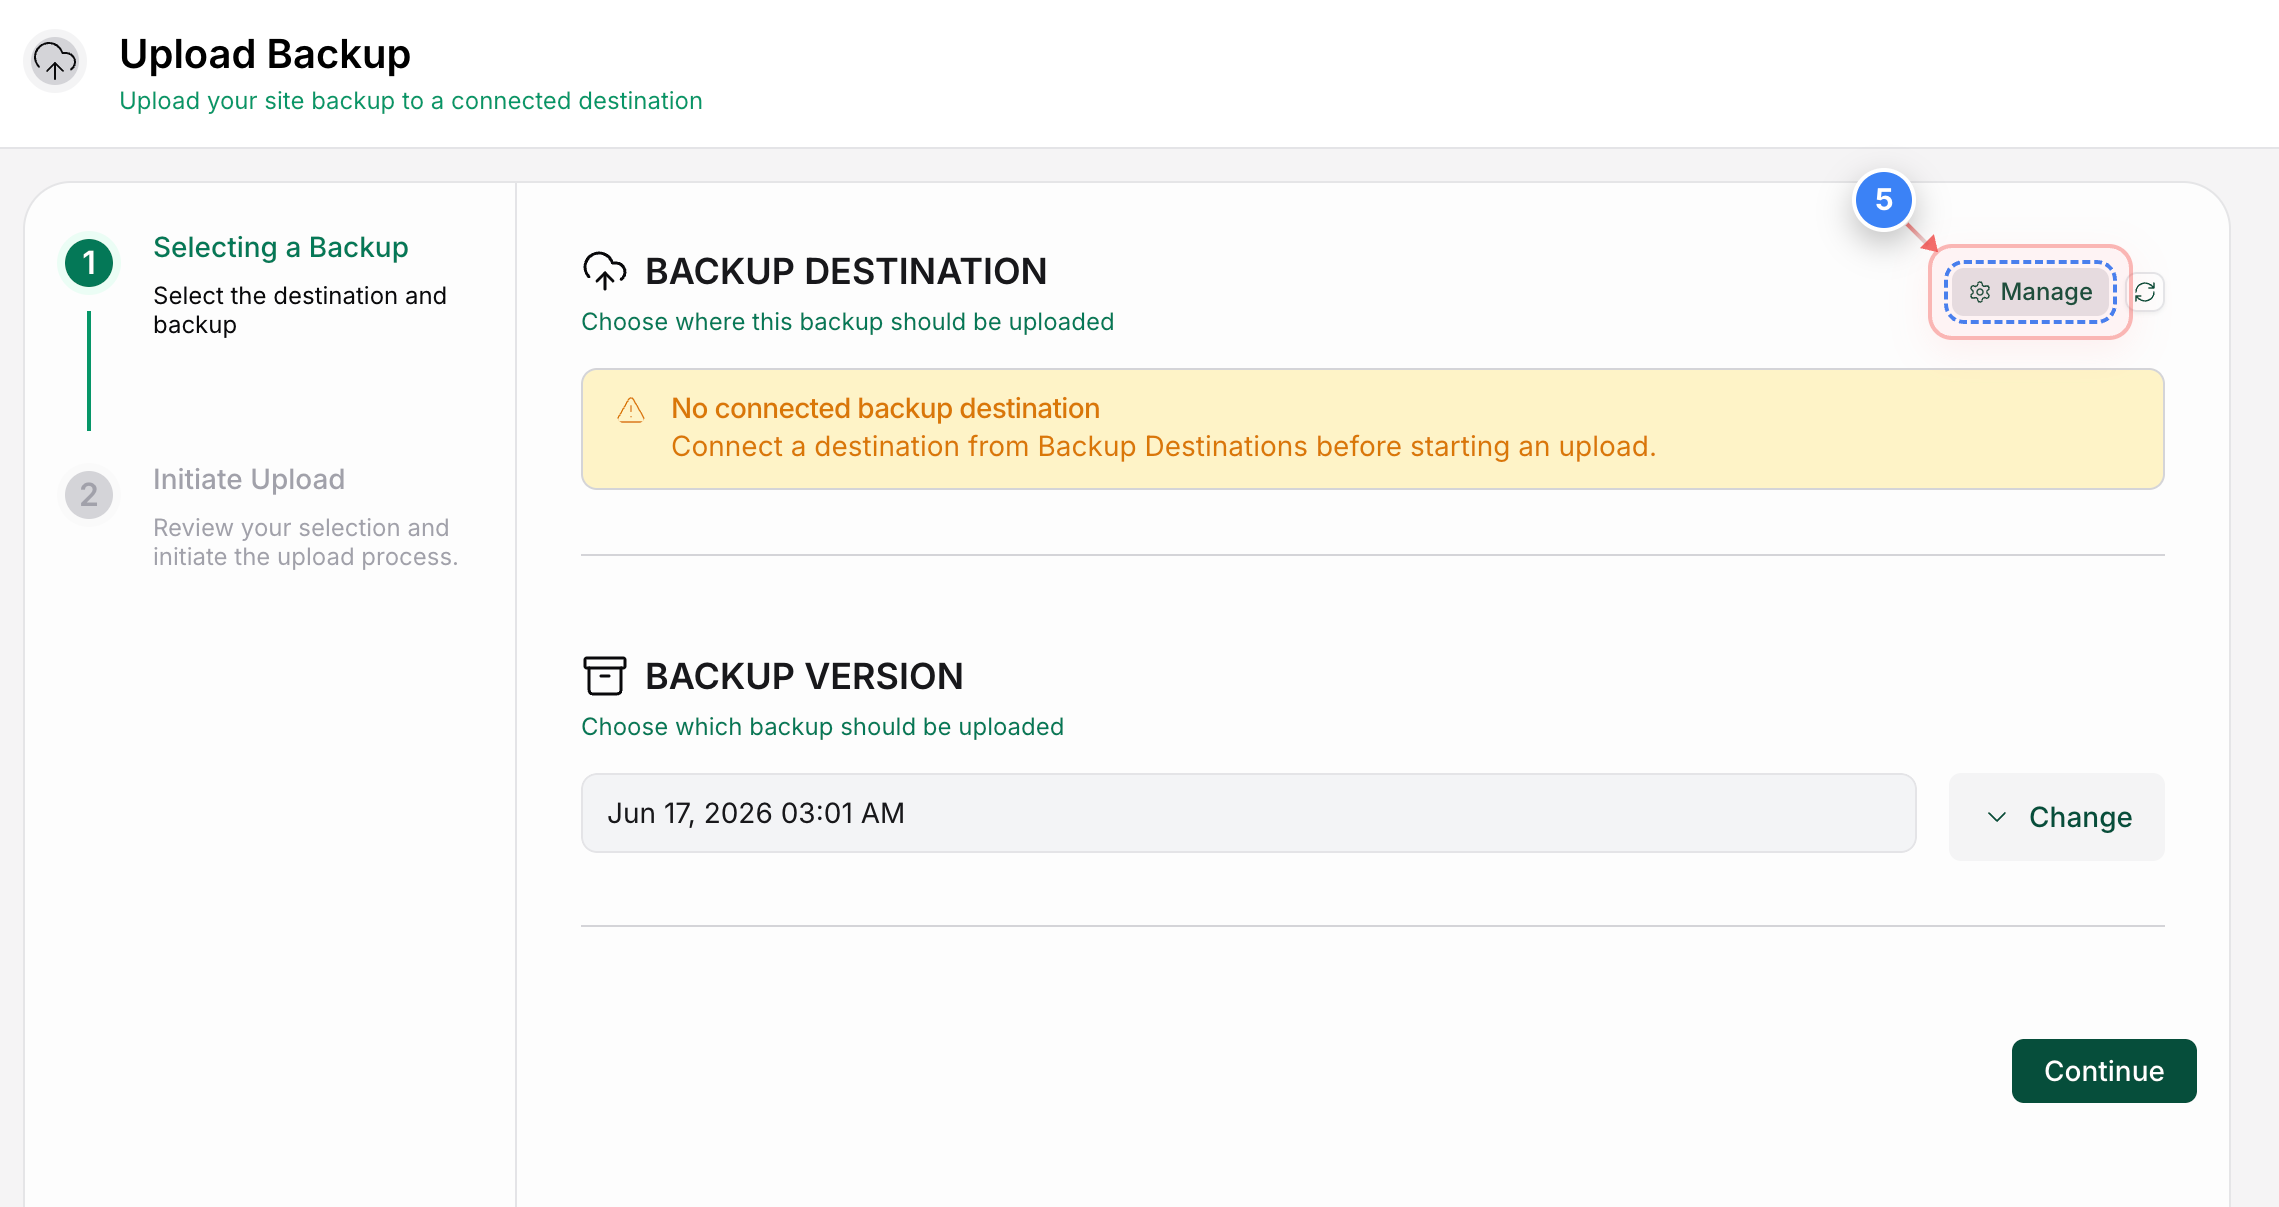
Step 5 of 10
Manage Backup Destinations
Click the Manage button next to the Backup Destination header to open your external cloud storage settings.
Note: This setup is required if you haven't linked to your Google Drive account yet.
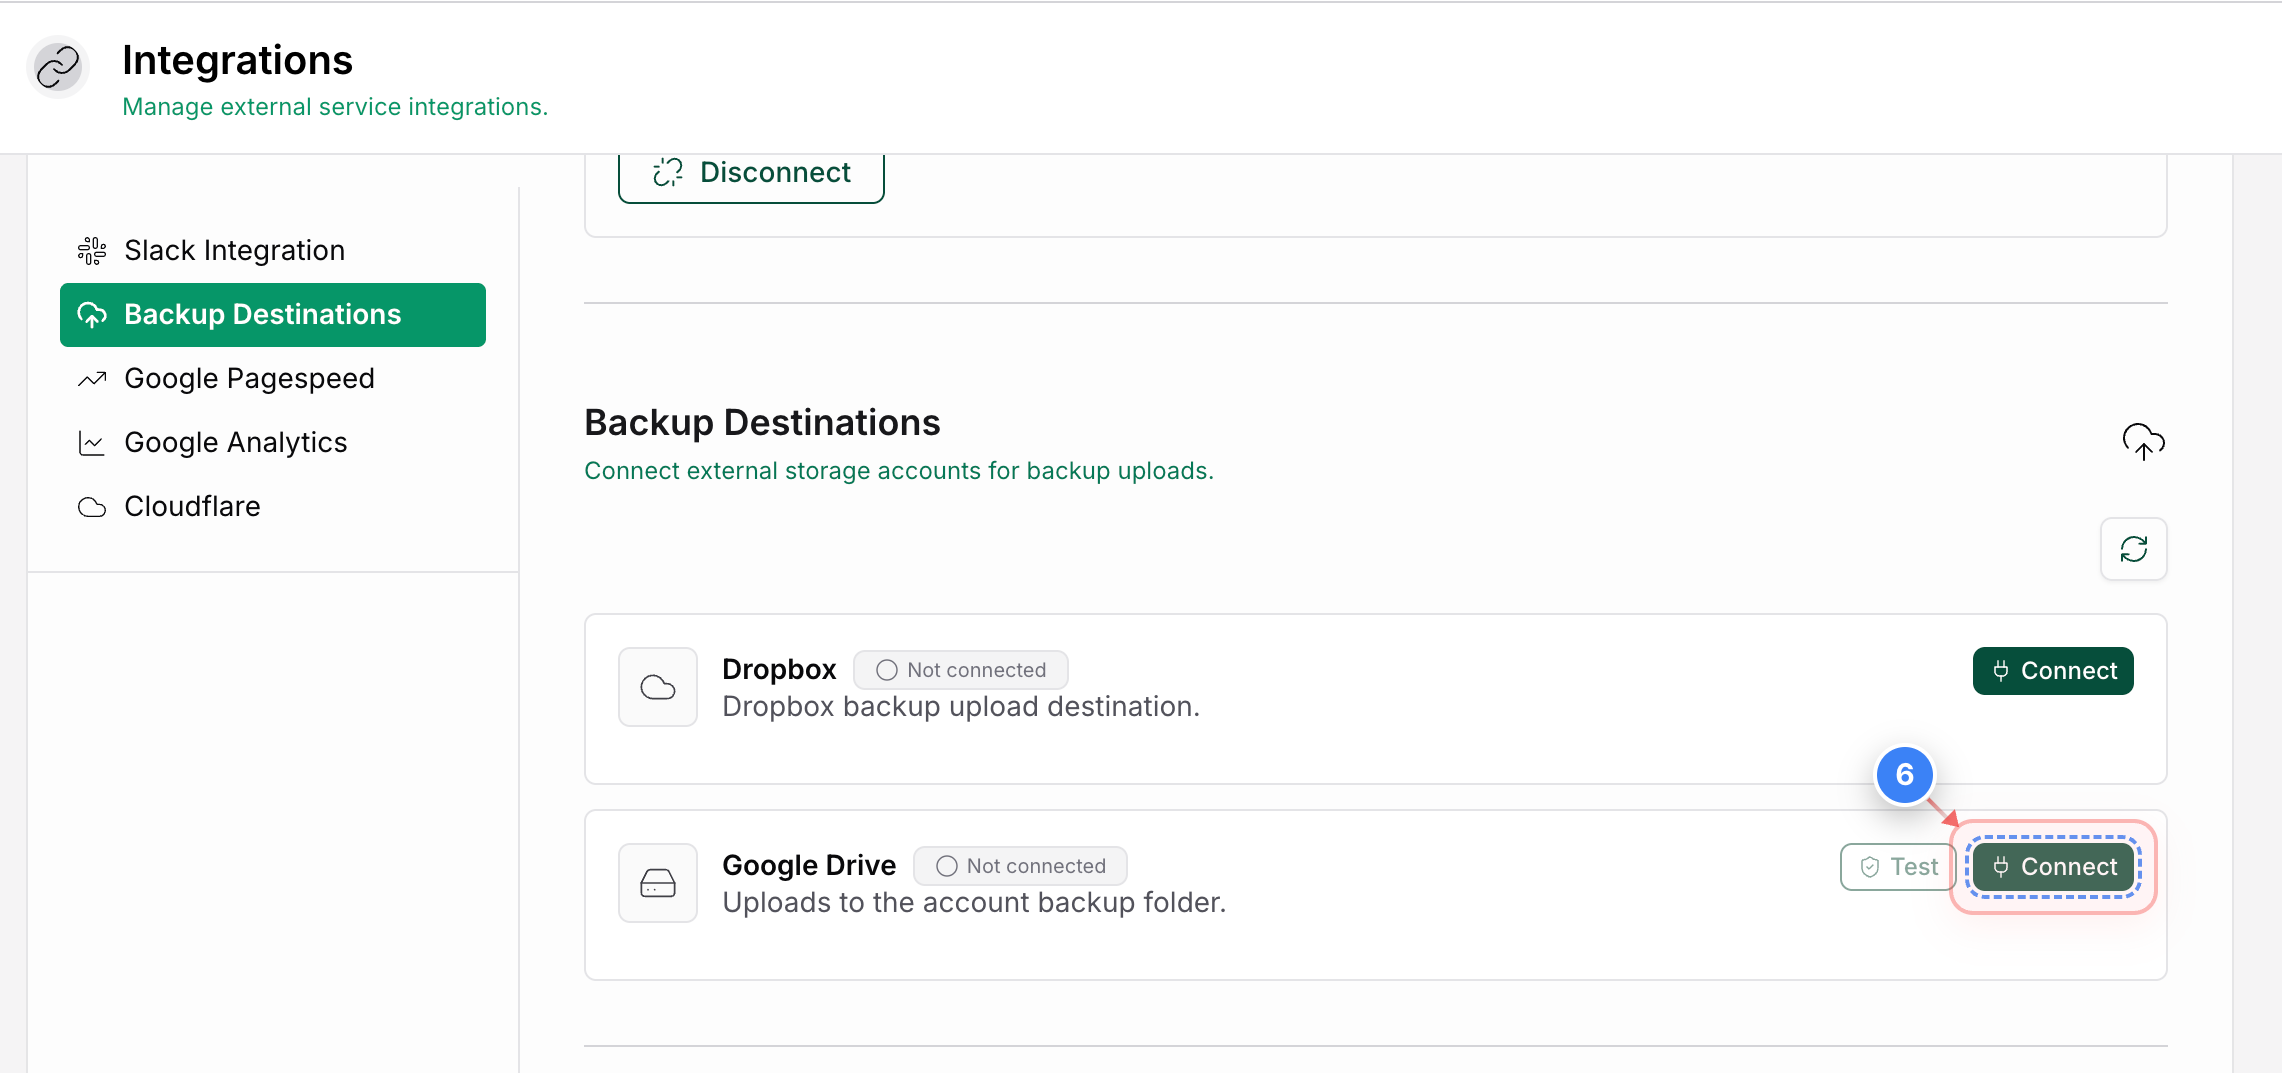
Step 6 of 10
Connect Google Drive
Click the Connect button next to the Google Drive option to link your Google Drive account.
Note: Once connected, the status badge will shift from Not Connected to Connected.
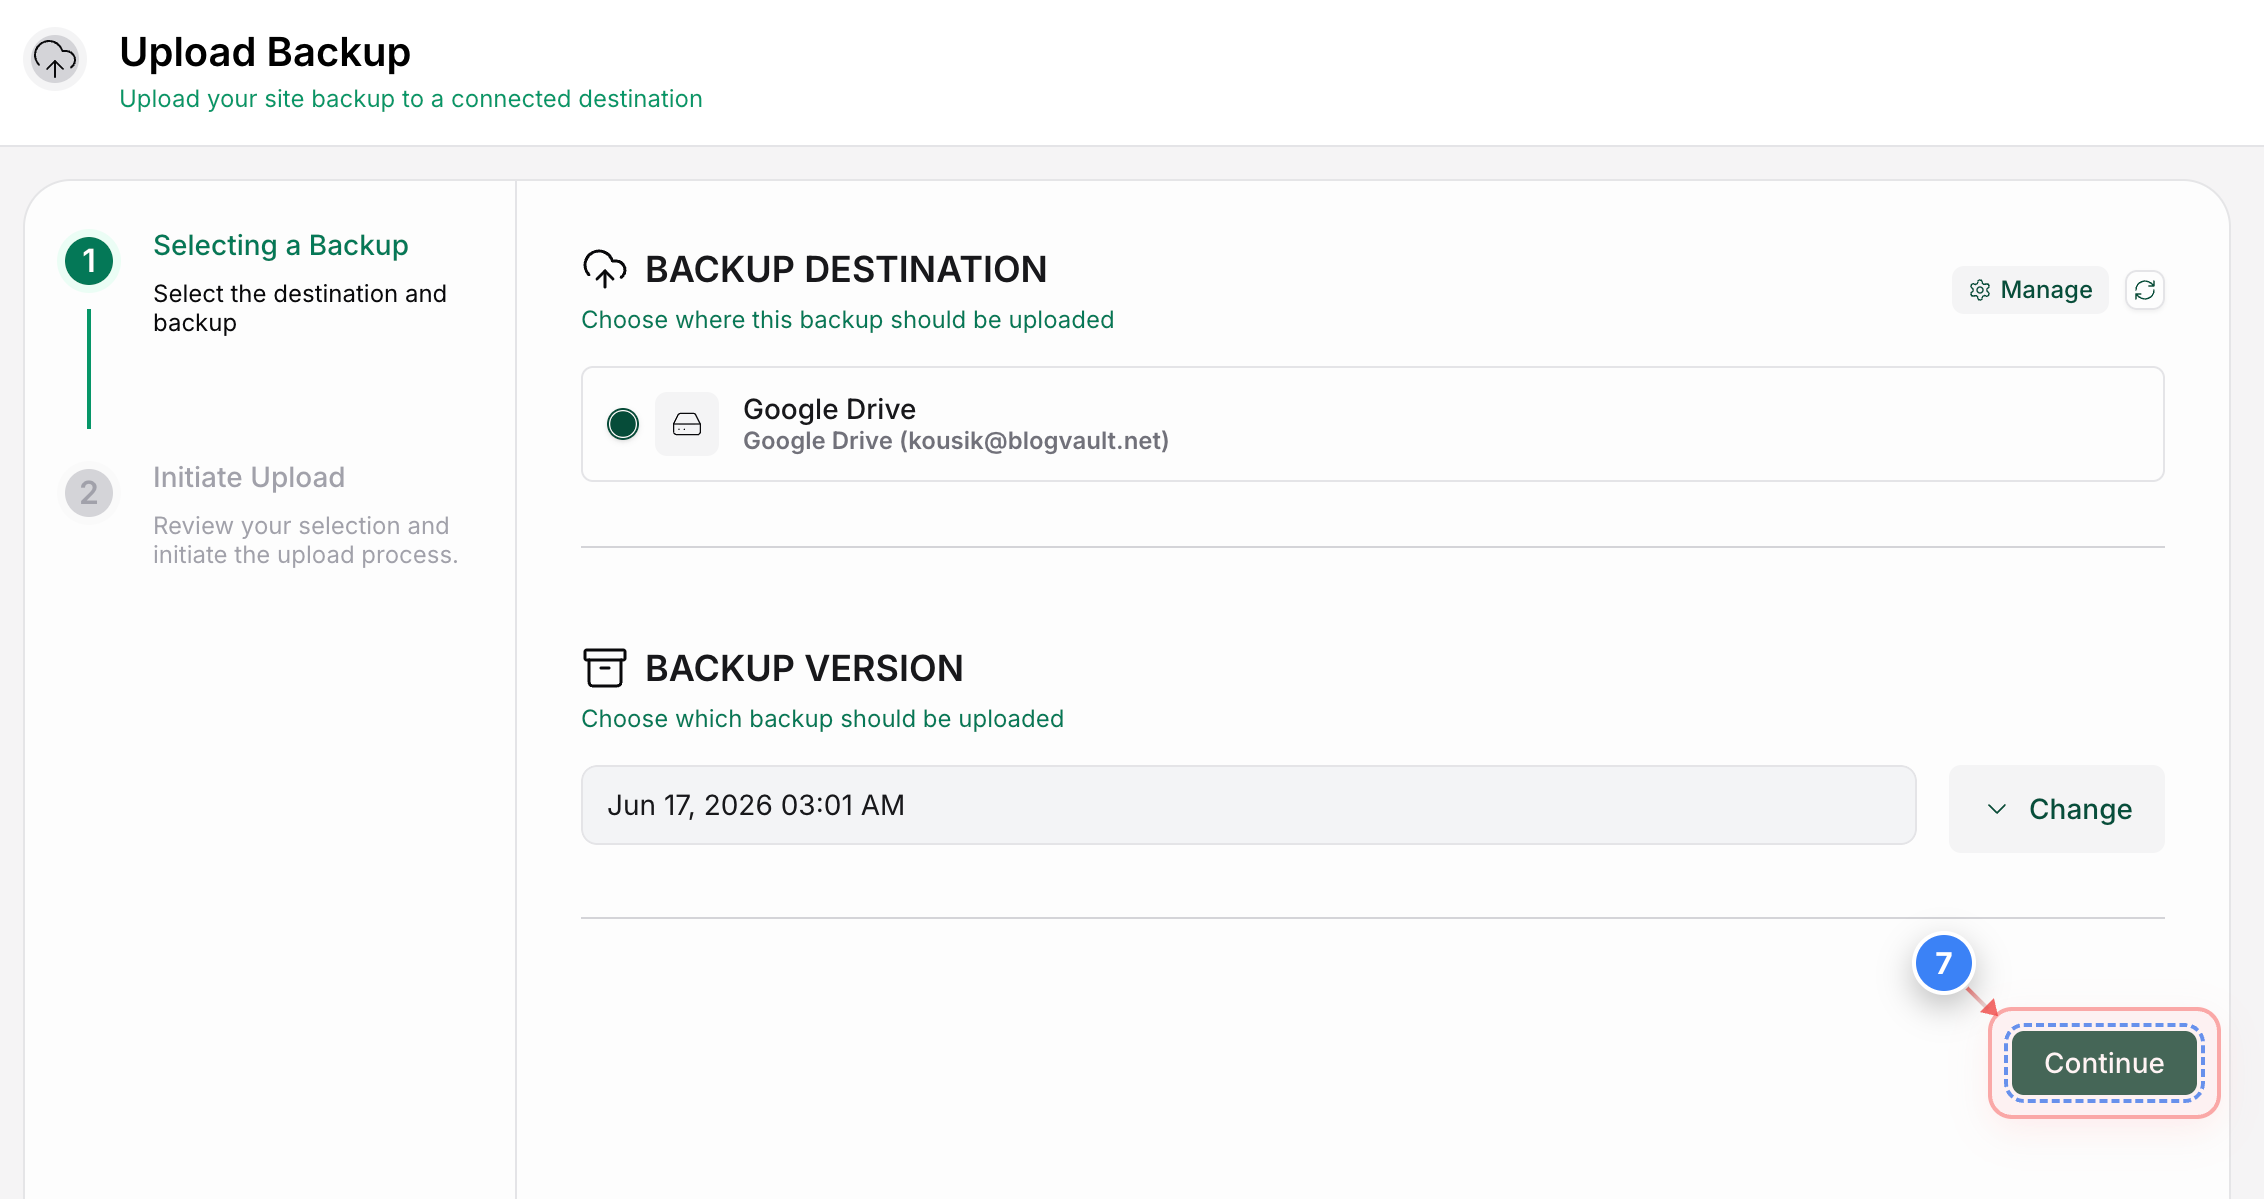
Step 7 of 10
Confirm the Destination & Backup version
Click the Continue button in the bottom-right corner of the configuration screen to review your upload settings.
Note: You can also change the backup version if you wish to upload another backup version
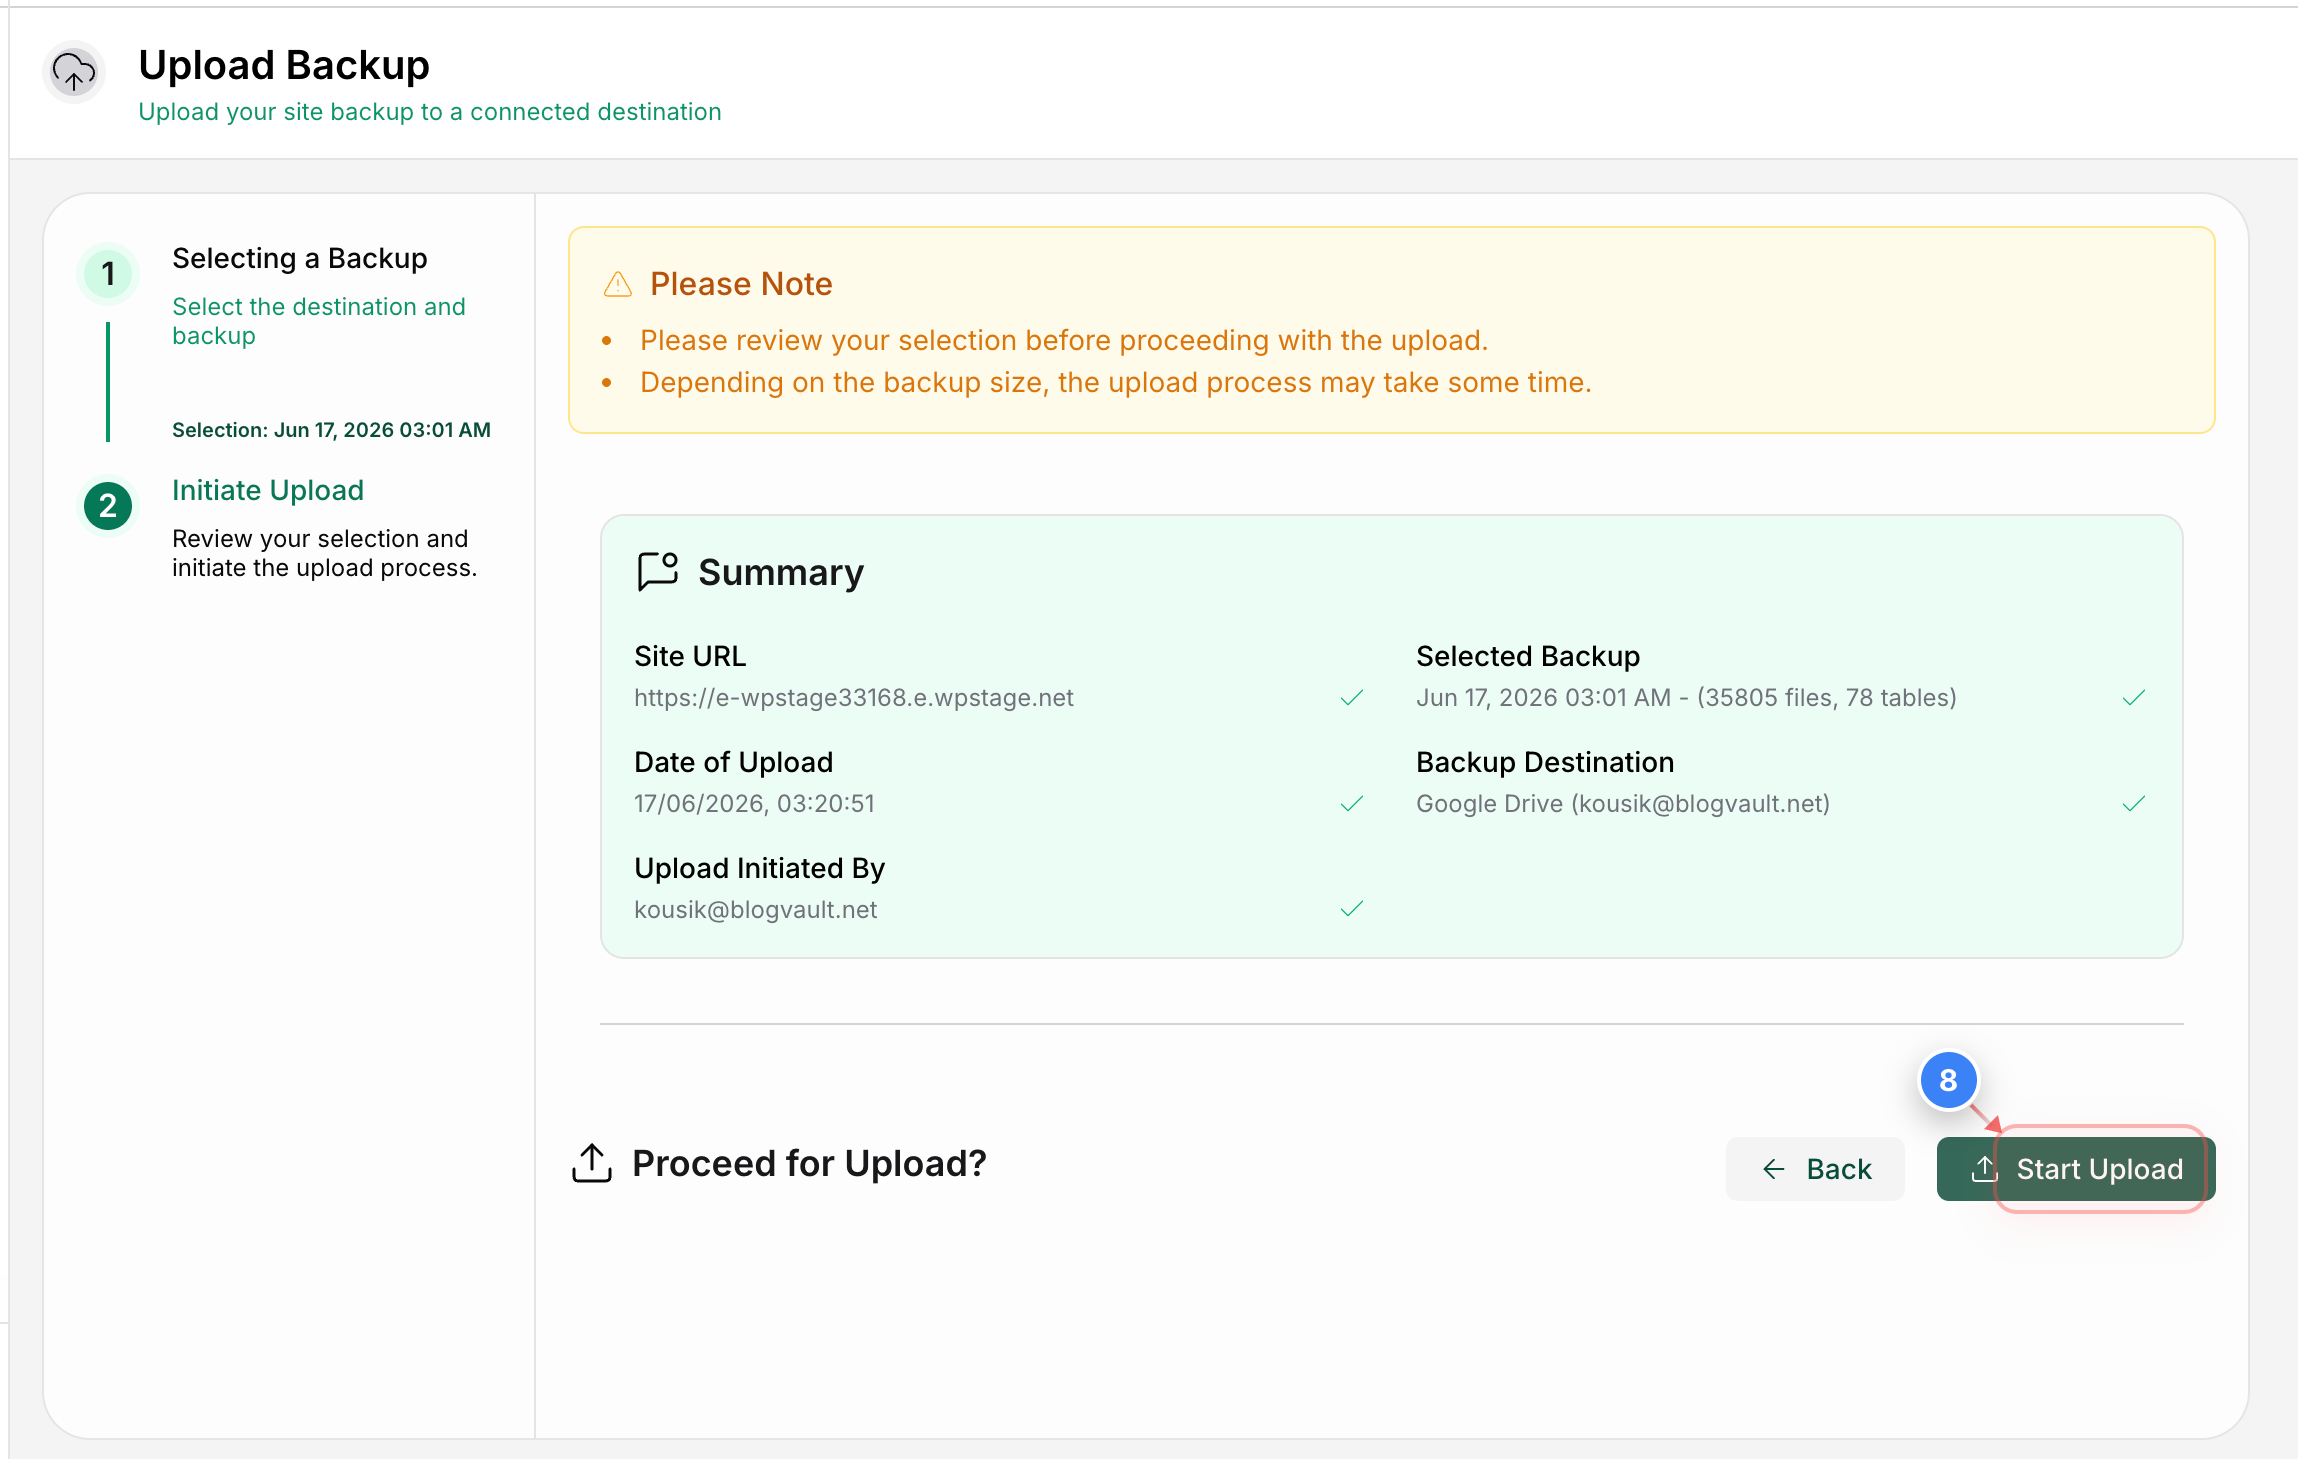
Step 8 of 10
Confirm and Start Upload
Click the Start Upload button in the bottom-right corner to begin transferring your backup to your cloud drive.
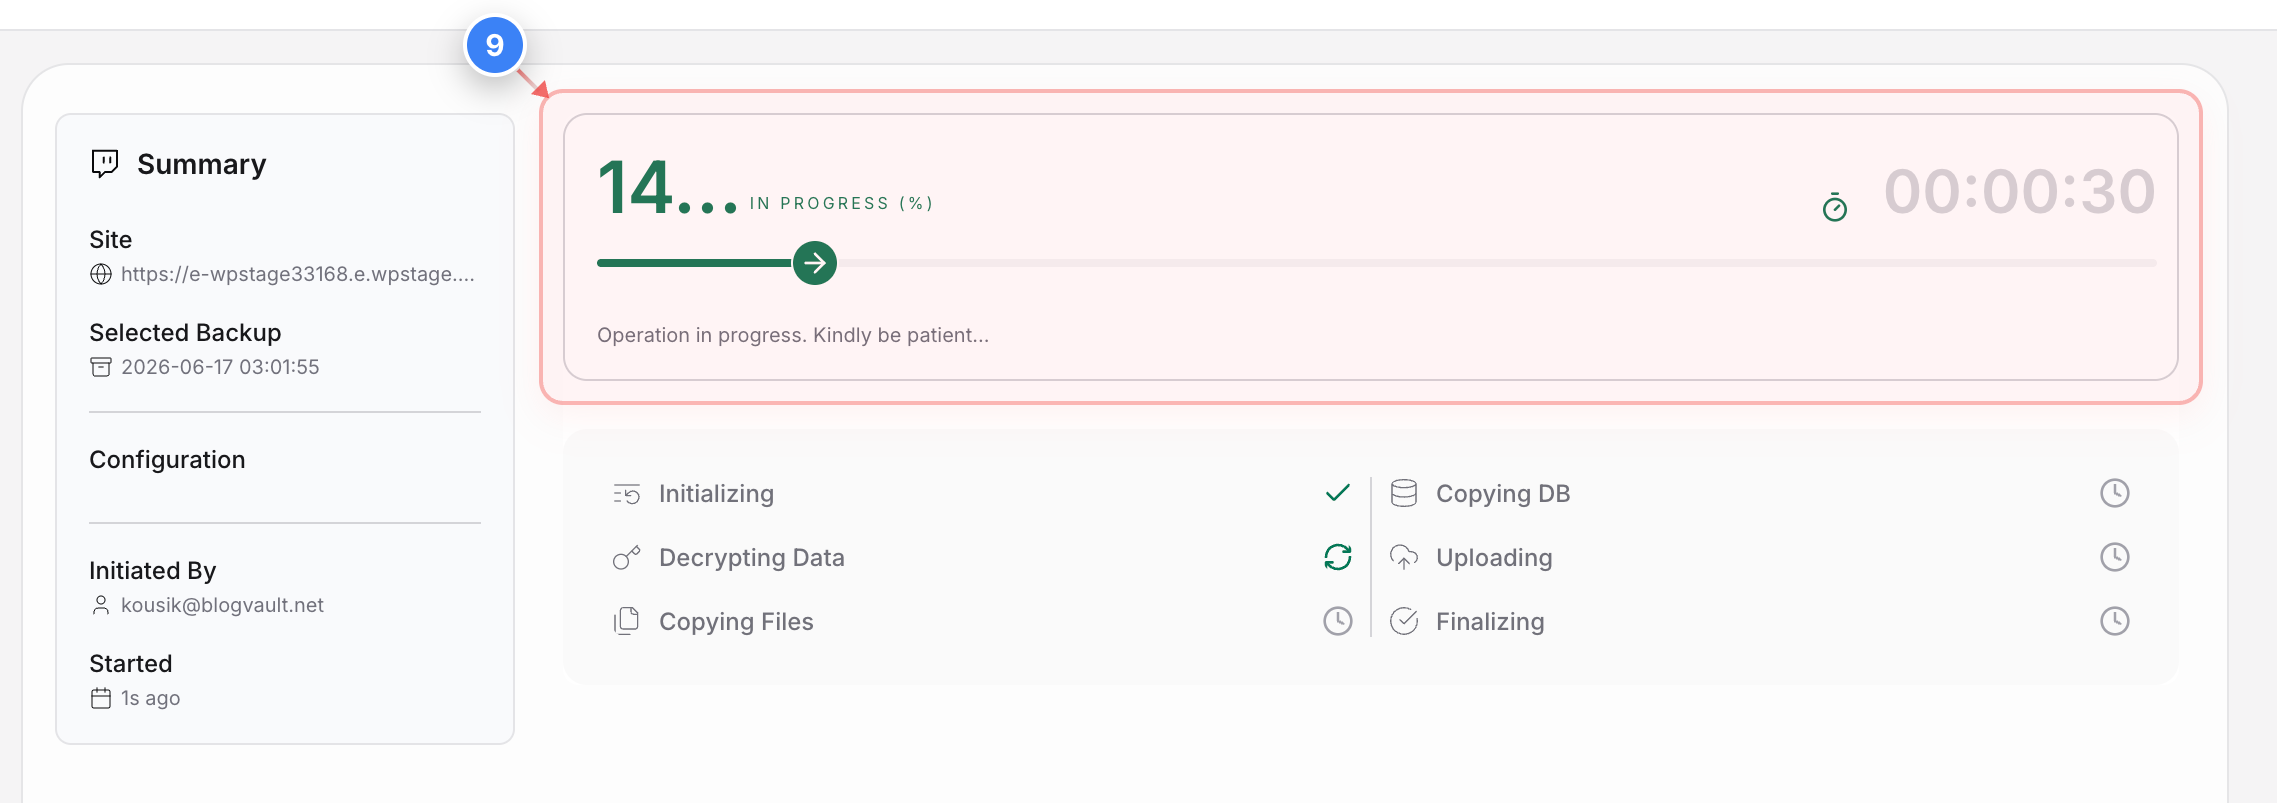
Step 9 of 10
Monitor Upload Status
View the progress bar to track the real-time status of your backup upload.
Note: You can also close the tab without any issues and the process will work in the backend
Step 10 of 10
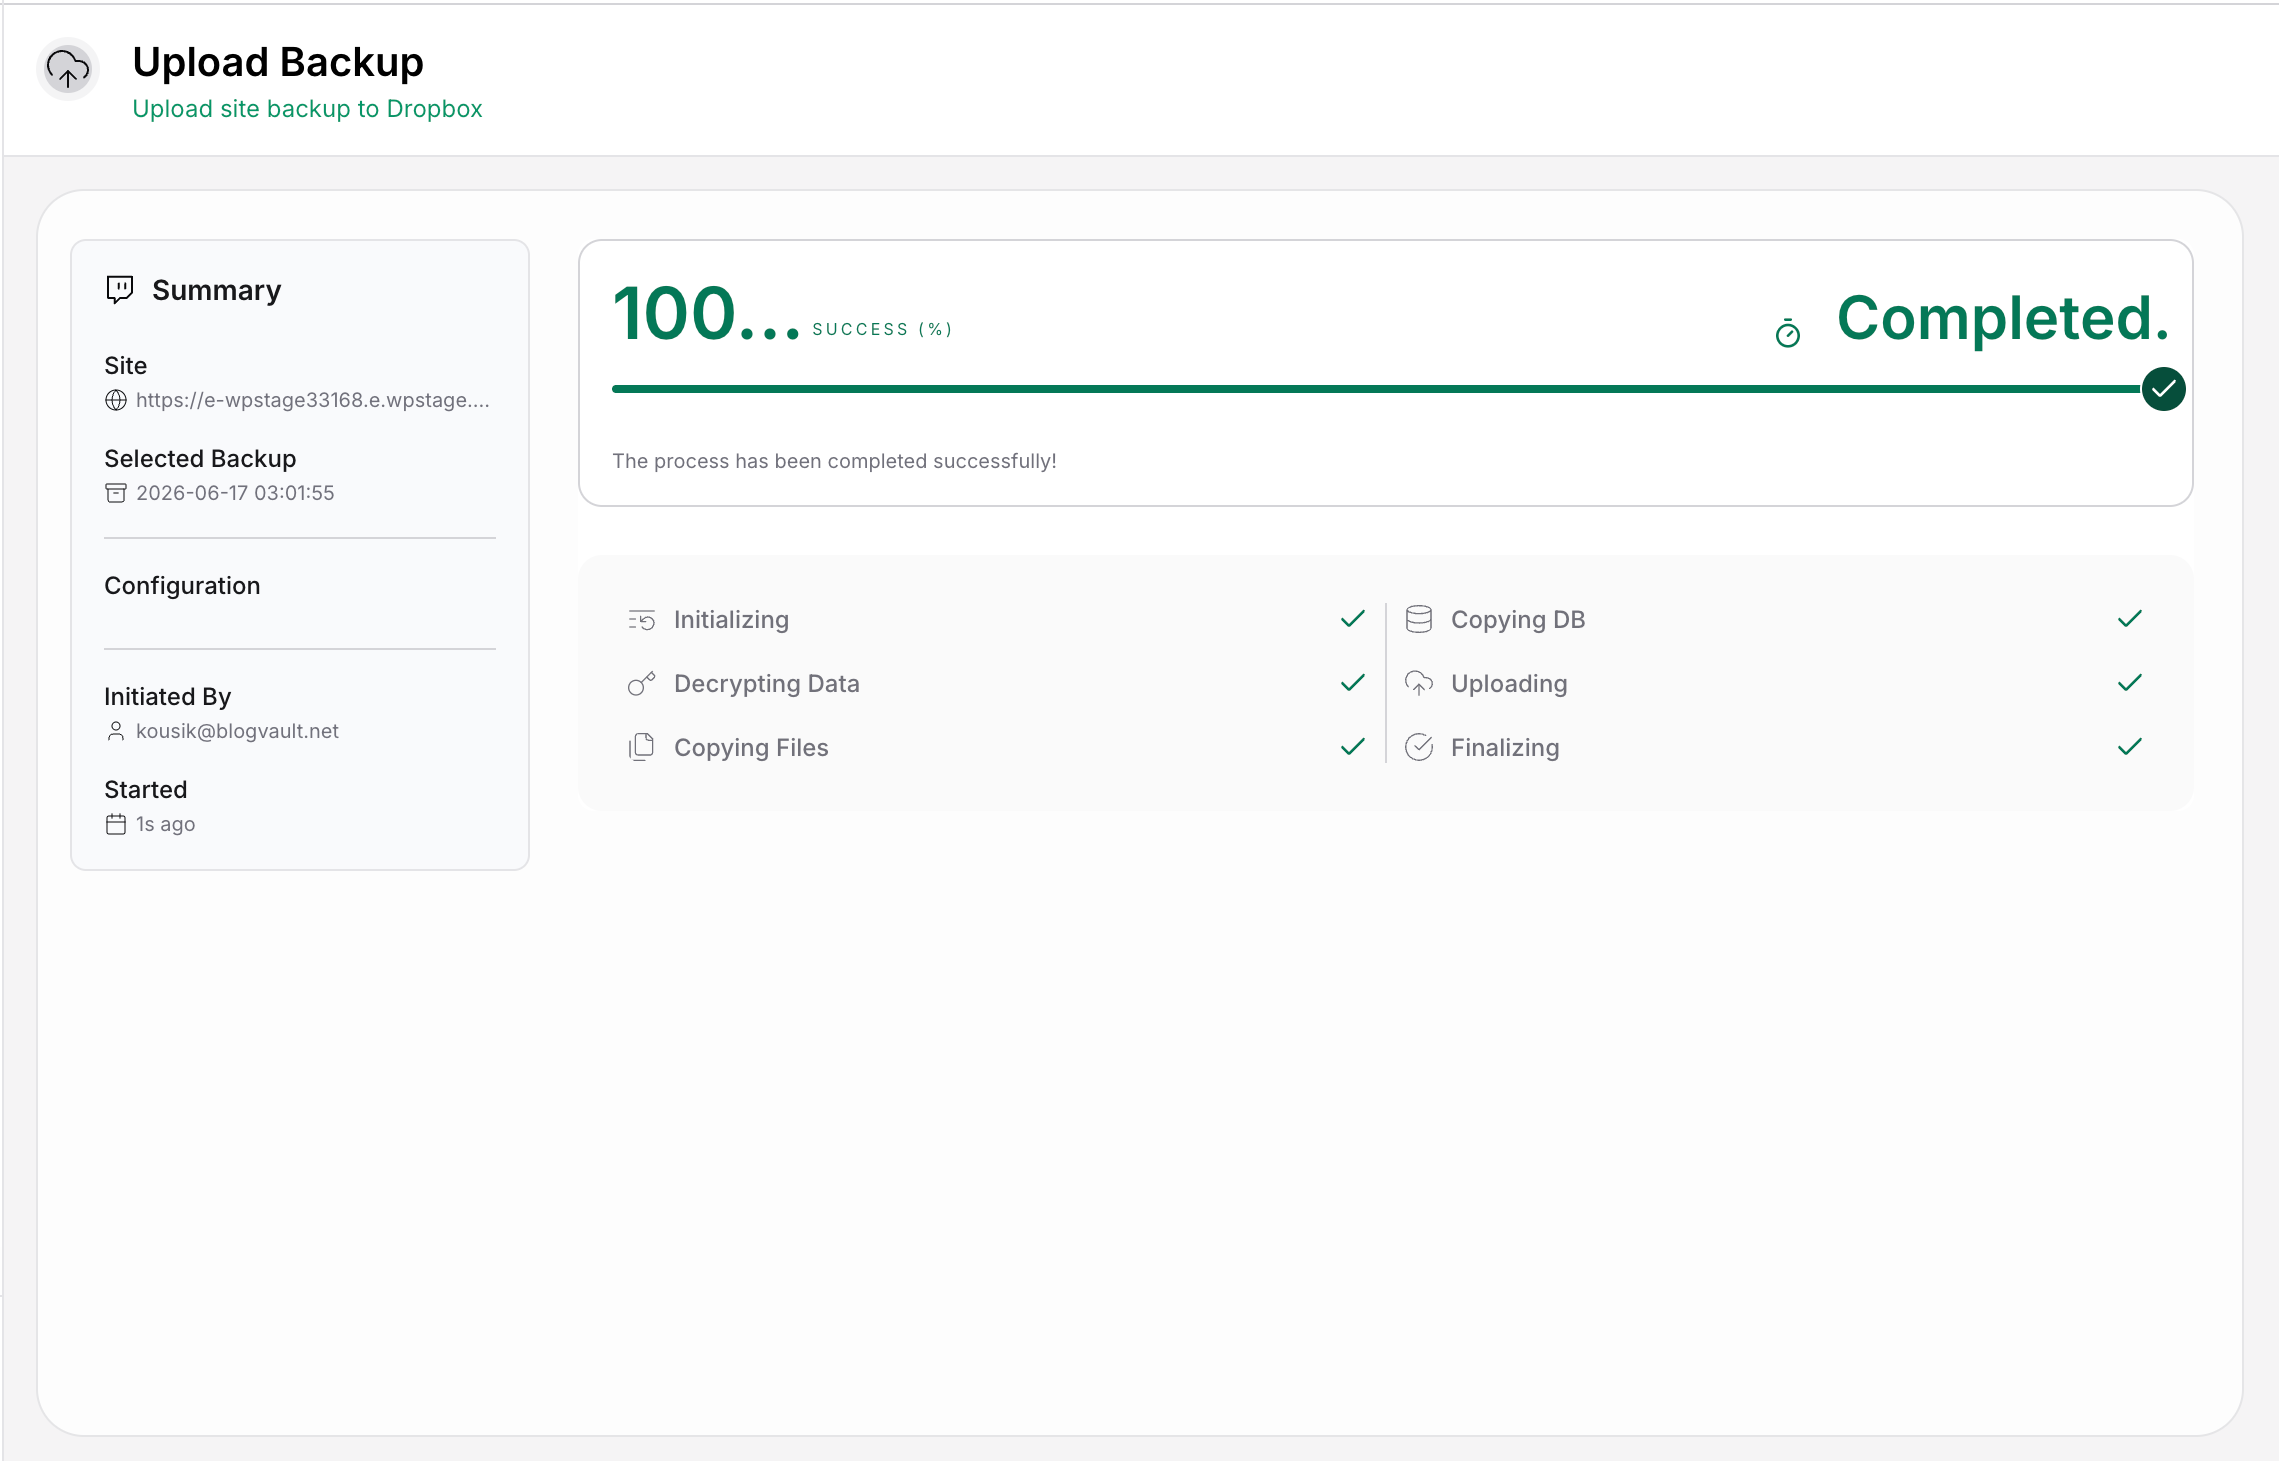
Verify Successful Upload
Confirm that the progress indicator shows a green 100% success with COMPLETED message to verify your upload completed perfectly.
Note: Once the process is finished, you will also receive an automated confirmation email from the system.