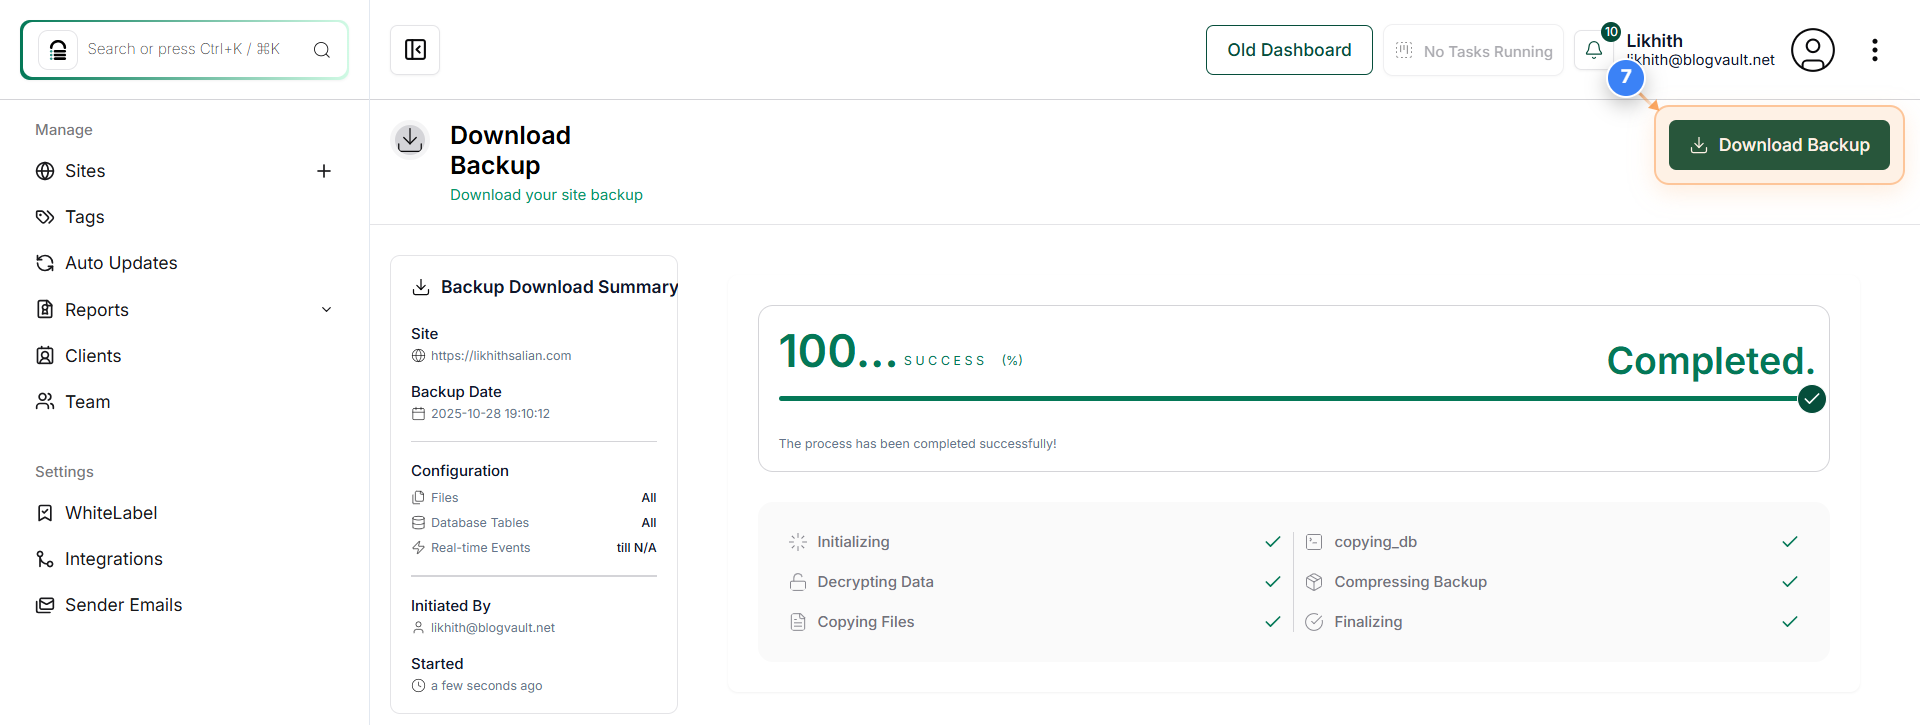
How to Download a Site Backup.
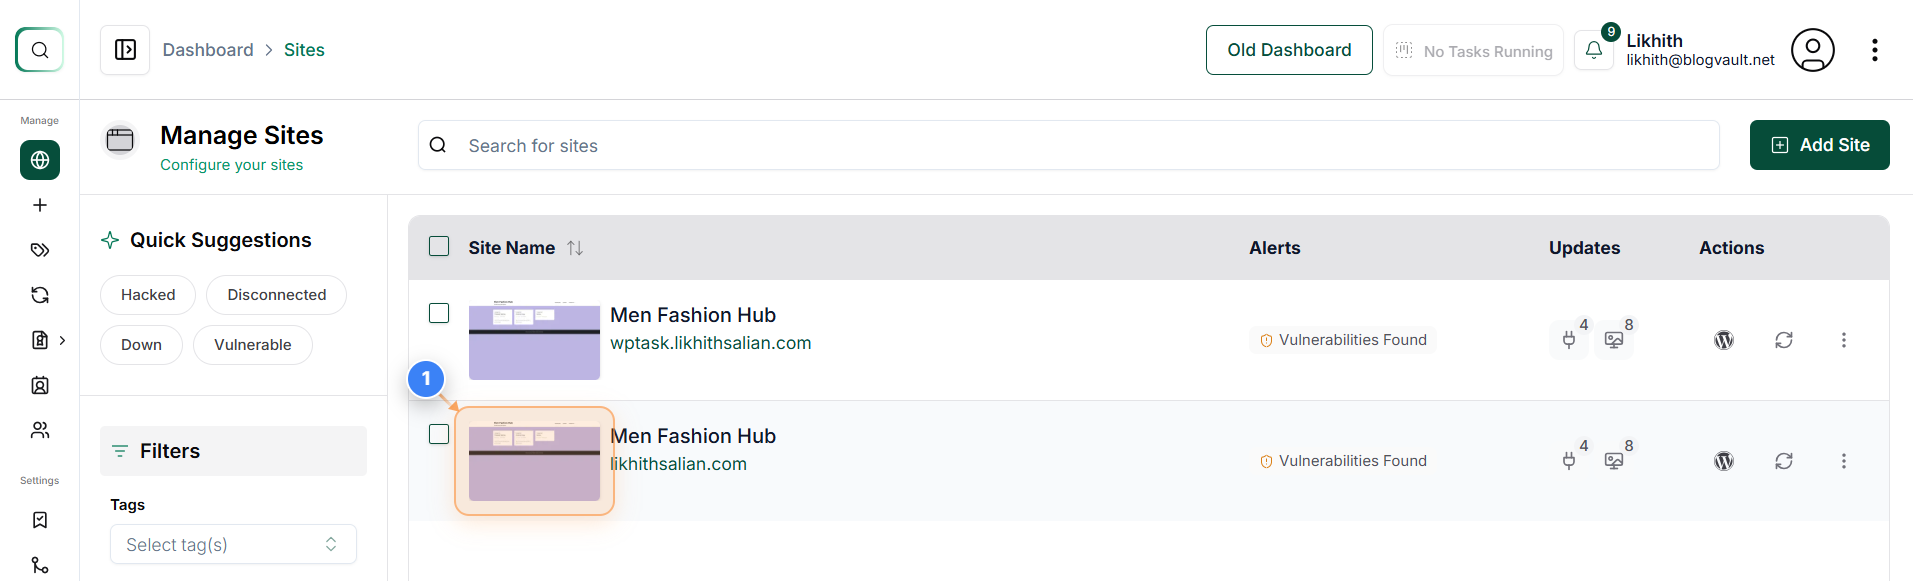
Step 1 of 7
Open Site Management
Click on your site thumbnail in the Sites Dashboard to open its management options.
Note: This allows you to access all settings, staging, and backup tools for the selected website.
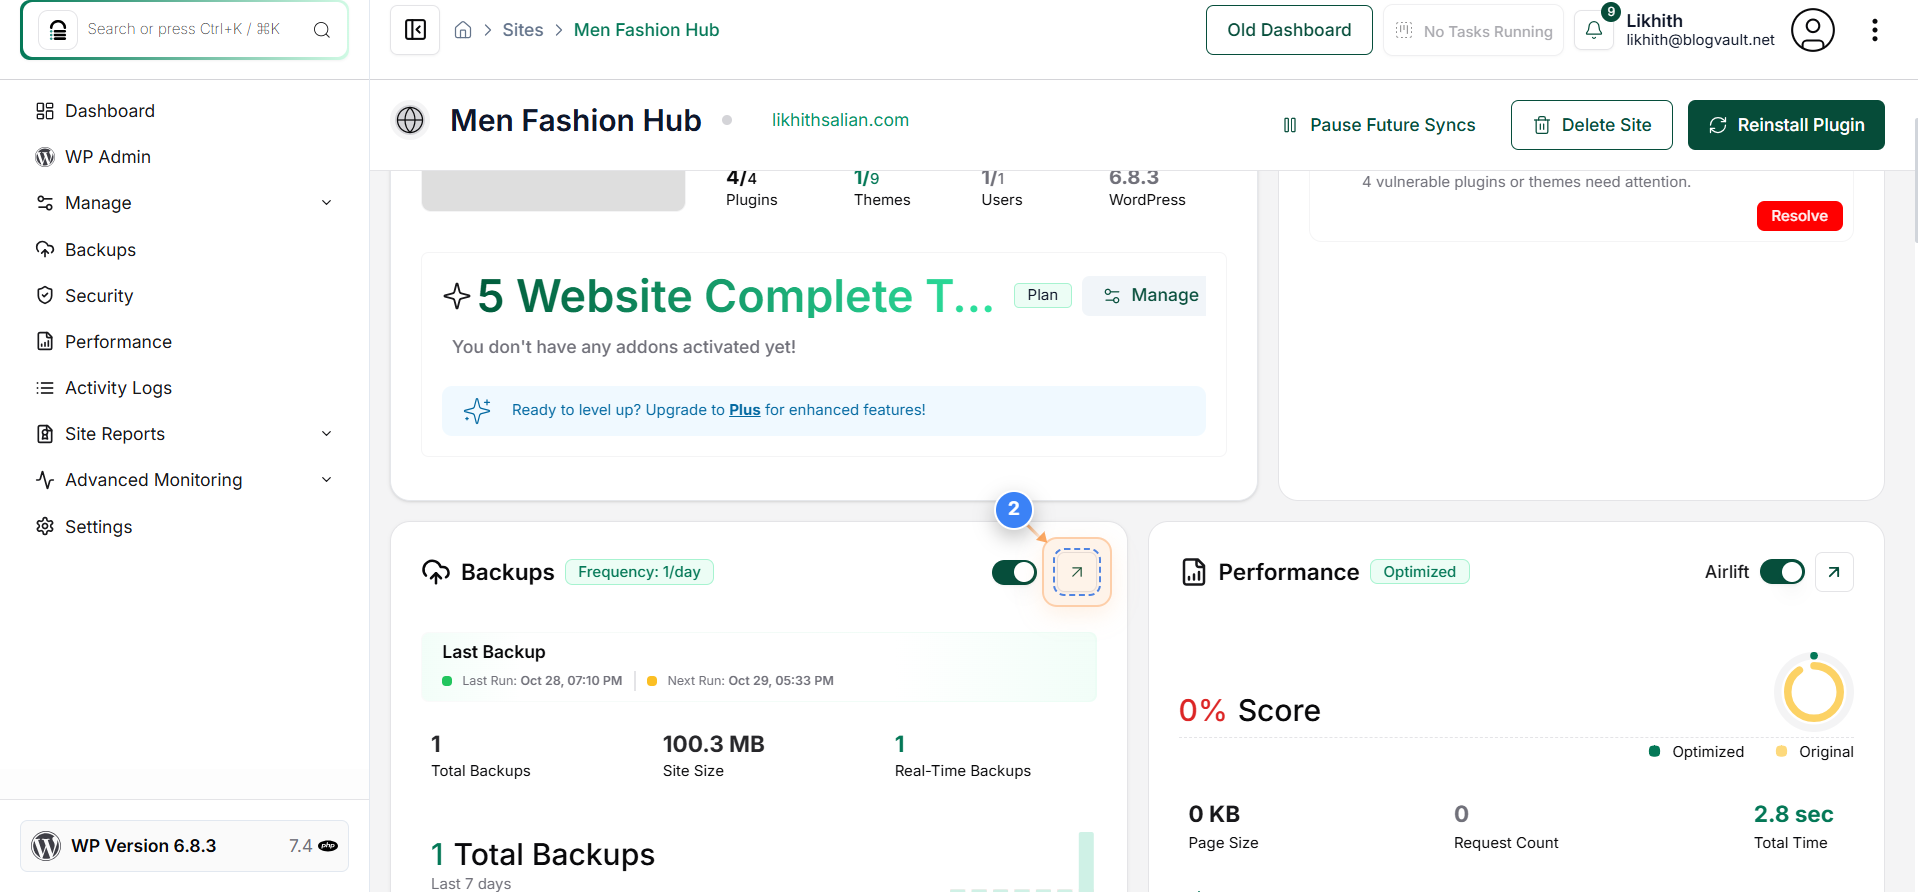
Step 2 of 7
Access Backup Settings
Click on the Backups section icon on the site dashboard to view backup configuration and details.
Note: This section shows how often backups are created and lets you manage backup options.
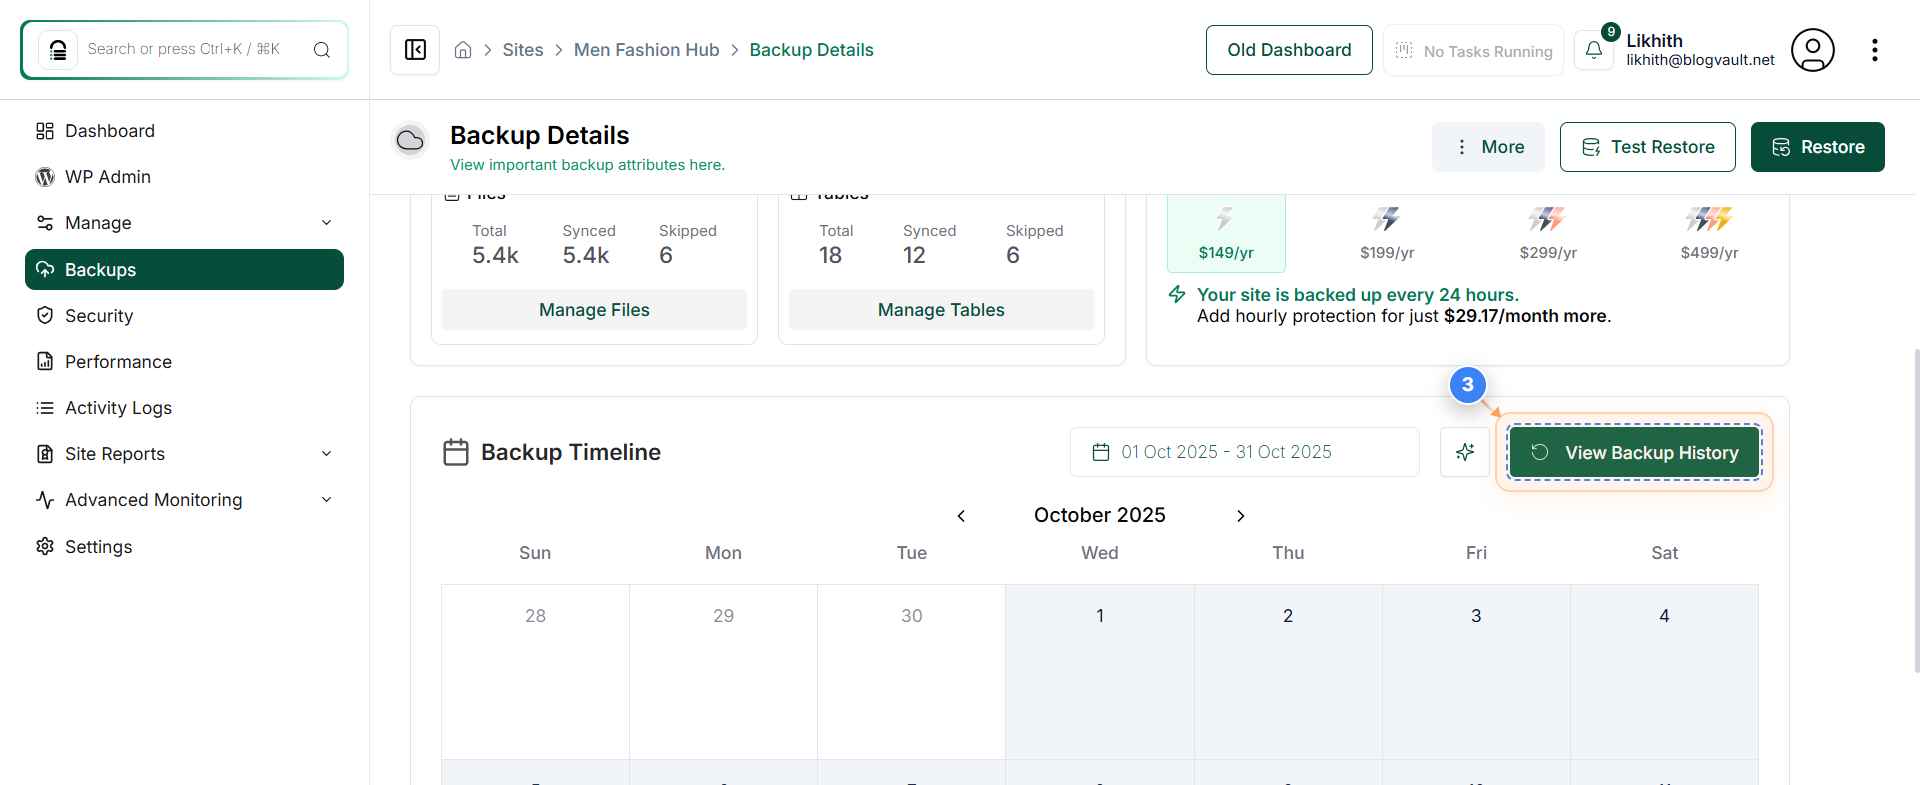
Step 3 of 7
View Backup Timeline
Click the 'View Backup History' button on the right side of the Backups page to open your backup timeline.
Note: You can review all backups and check their status here.
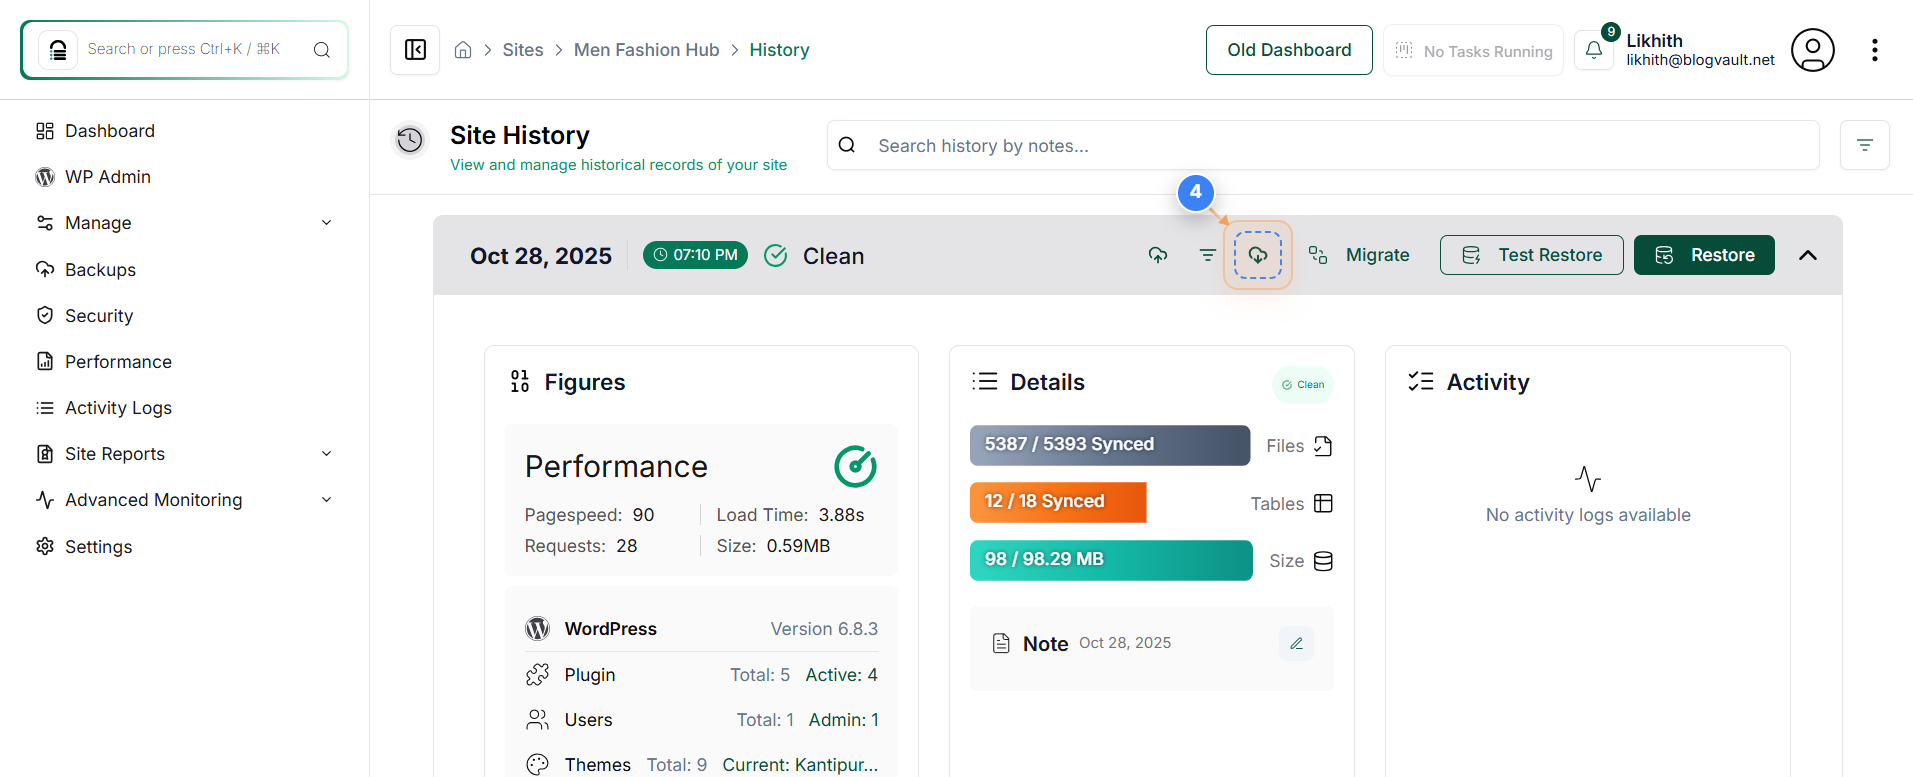
Step 4 of 7
Select a Specific Backup
Click on the download button on the backup date link in the Backup Timeline to open details for that specific backup.
Note: This shows backup time, date, and its verification status.
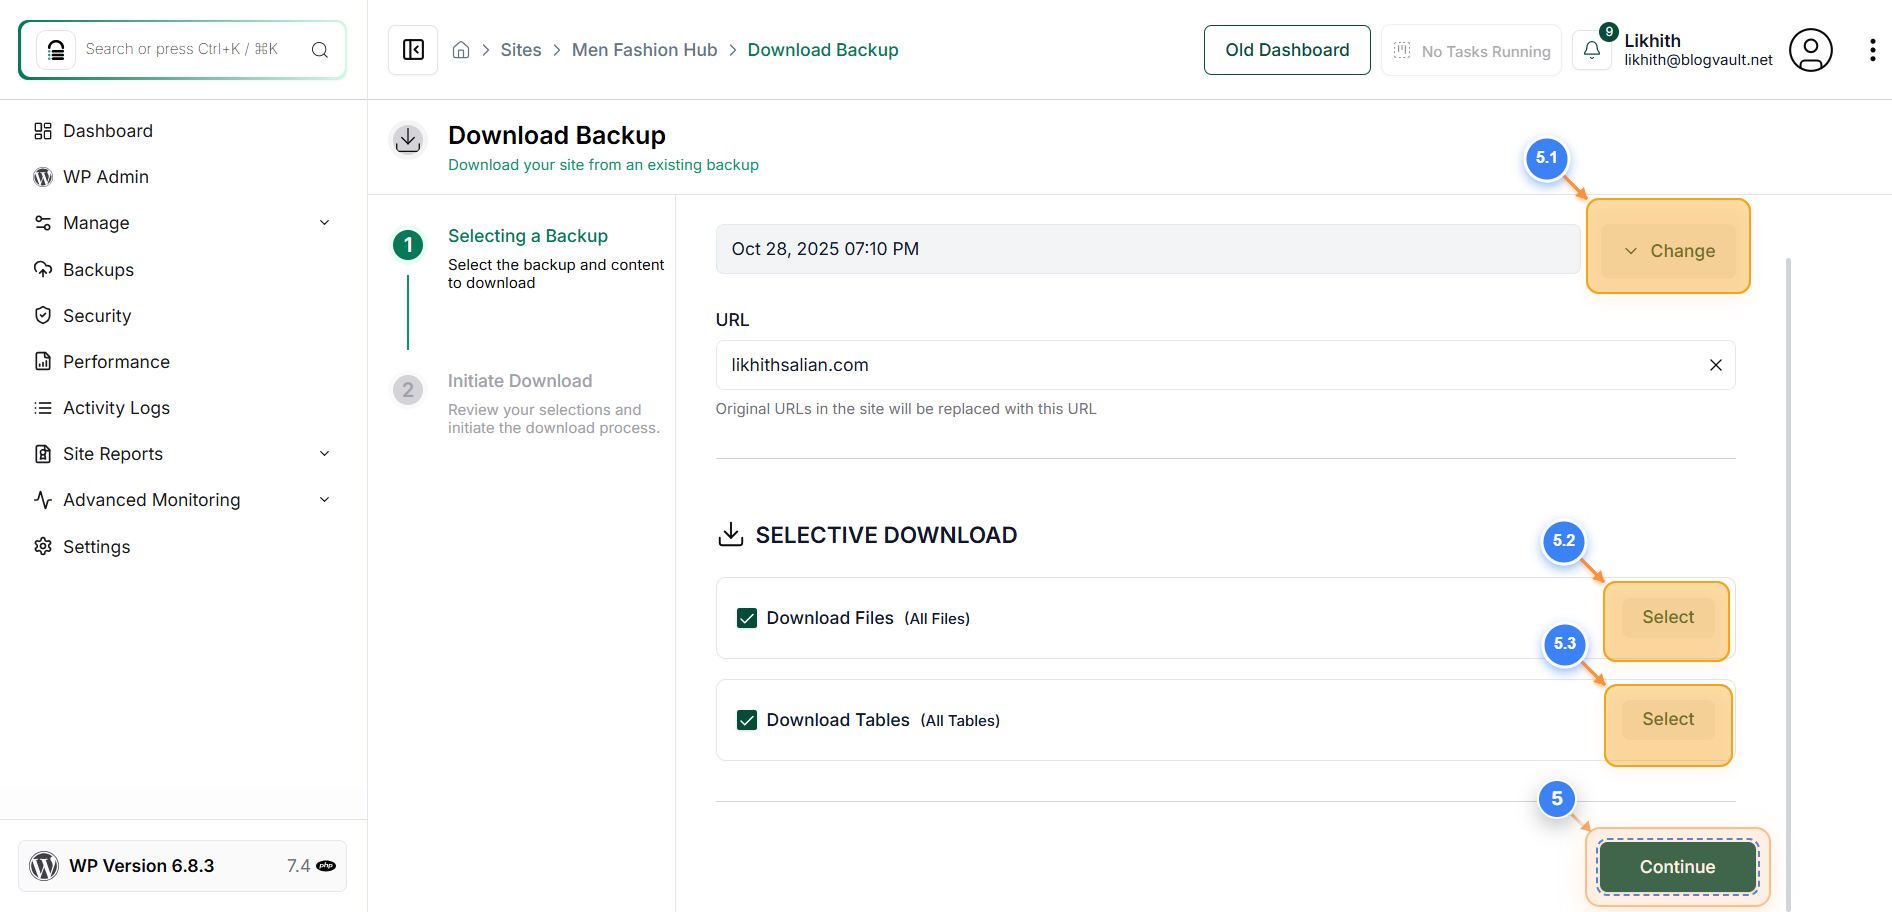
Step 5 of 7
Confirm Backup Version
Click the 'Continue' button at the bottom-right of the page to proceed with selecting your backup version for download.
Note: You can choose specific components (such as database, files and backup versions) before confirming the download(Steps 5.1, 5.2, 5.3).
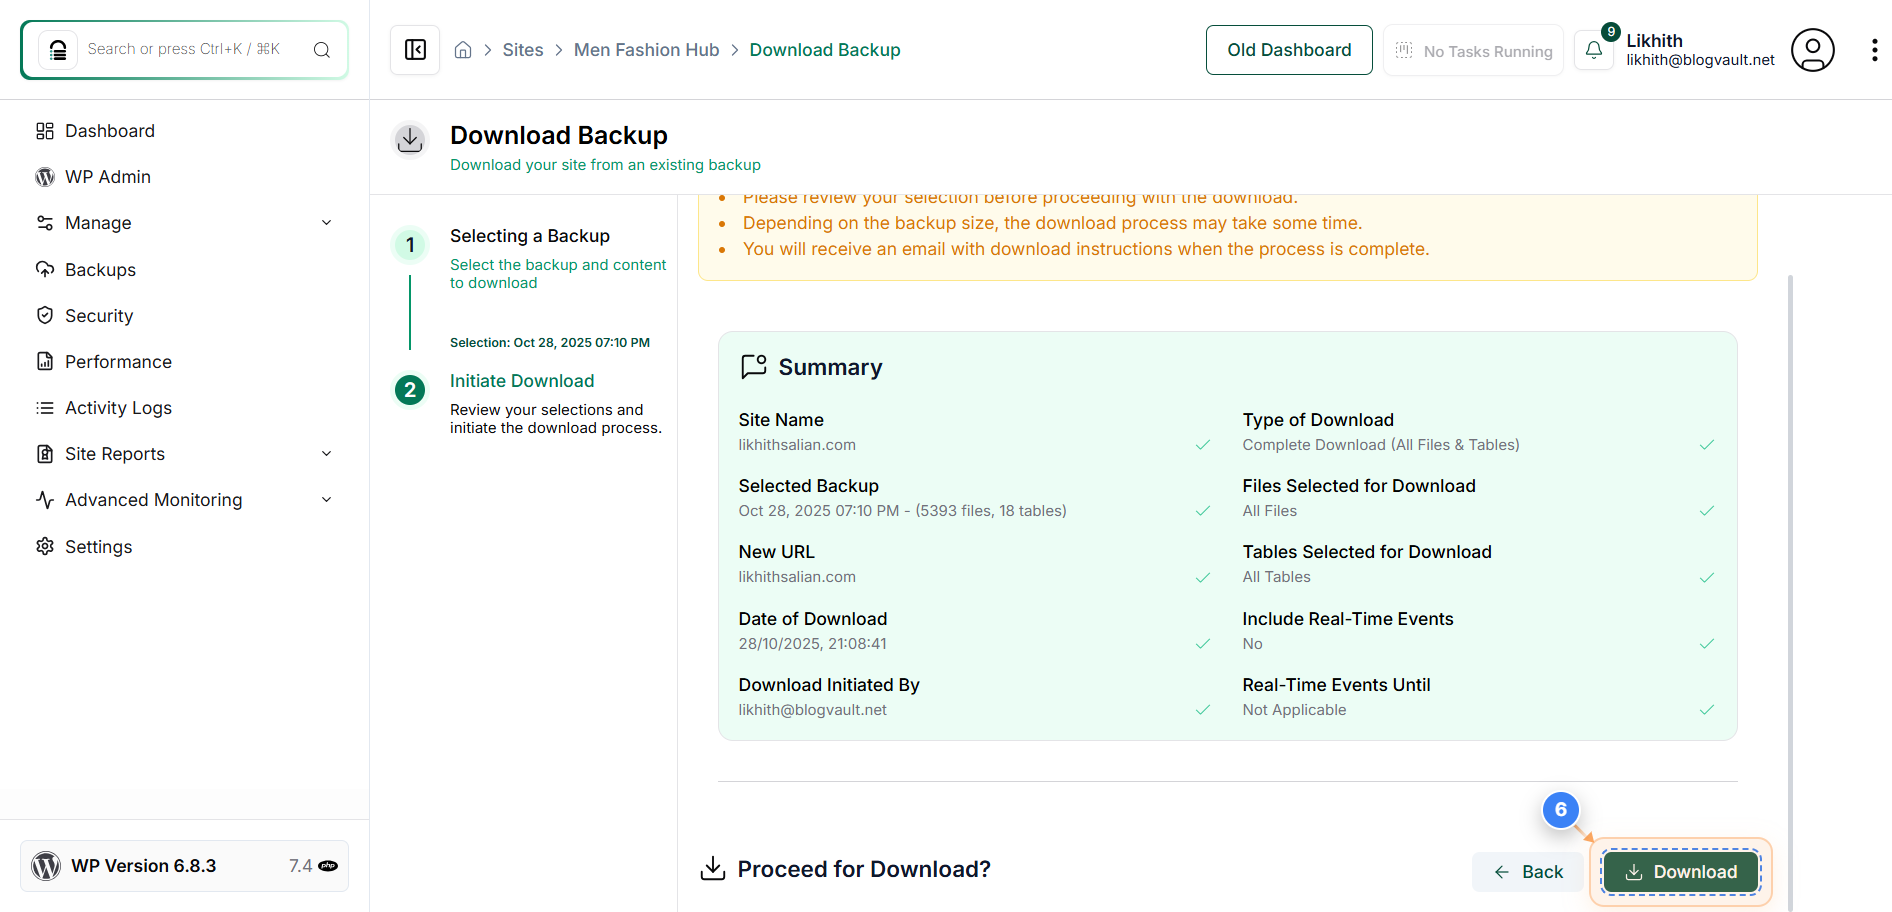
Step 6 of 7
Review Download Summary
Click the download icon button at the bottom-right to review your download summary and confirm your selections.
Note: This page provides important notes about download time and delivery method.
Step 7 of 7
Download Backup File
Once the process is complete, click the “Download Backup” button in the top-right corner of the page to save your backup file locally.
Note: Depending on backup size, the download may take a few minutes. You'll also receive an email with further instructions.